Yes, they are still out there!!!

According to the green book:
B-7521-A is for all engines 32-34 and is 3-9/16" long
40-7521-A is for 8 Cyl 85 HP 33-34 as well as 60 HP 37-39 and all the 8 Cyl 40-48 it is 4-11/64" long
According to the 35 Chassis parts book:
B-7521-A is only 3-1/8" long but is still used on 8 Cyl. 32-34
40-7521A length is not listed but is still for the 8 Cyl. 33-34
46-7521 is for 4 Cyl. the green book list the length at 2-3/16"
in addition the book list 48-7521 can be used on all the above. The green book list it's length at 4.0"
So there are some choices, even by Fords standards, for the V8. The 4 Cyl. adjustment rod is not one of them.
 
Mart, do you have information that says the short one was for the 4 cylinders? I could not find the exact reason that two rods exist. I did not know if a pedal design change was reason or what, let me know if you find something.

No info as such except that the 4 cylinder trans is mounted further back than the V8 trans. (torque tube is longer for a V8 than a 4 cyl.)

So as the pedals are in the same place, the V8 push rod must be longer than the 4 cyl to reach the clutch release rod which is further forward on a V8 than a 4.

Just kind of extrapolating the info I have.

So here's a question: Is the trans cover different on a 4 cylinder 33/34 than a V8?

I think it must be.

Mart.
 
First & third pics are from March 34 parts list and the second pic is June 35 parts list . I'll let the pics do the blah-blah-blaaah thing .
No info as such except that the 4 cylinder trans is mounted further back than the V8 trans. (torque tube is longer for a V8 than a 4 cyl.)

So as the pedals are in the same place, the V8 push rod must be longer than the 4 cyl to reach the clutch release rod which is further forward on a V8 than a 4.

Just kind of extrapolating the info I have.

So here's a question: Is the trans cover different on a 4 cylinder 33/34 than a V8?

I think it must be.

Mart.
 

Attachments

  • IMG_0003 - Copy.JPG
    IMG_0003 - Copy.JPG
    70.3 KB · Views: 34
  • IMG_0004.JPG
    IMG_0004.JPG
    66.9 KB · Views: 18
  • IMG_0002.JPG
    IMG_0002.JPG
    72.3 KB · Views: 16
Thanks everyone for clutch adjustment rod info, replaced and drove car again yesterday, everything seems fine with clutch, BUT!!!!
.
I purchased a used 35/36 transmission in car temporarily that has 39 gears, ( transmission was done according to Van Pelt instructions ) I had no history of the use, drove car yesterday and it cries in 3rd gear. Called a very knowledgeable man on transmissions in our area and told him the symptoms about noise while accelerating and no noise will going down hill, he told me the bearings need replaced. That is story #1. Next, when I completely reworked the front and rear end I greased the leaf springs individually. (I have sent off shocks to have rebuilt.) With this information I have found the car is dangerous to drive! It is like driving a bouncing ball, I dropped air pressure to 25psi, but if you are driving up a hill ( which we have a lot of down here ) it gets bad wheel hop with just minor bad spots in asphalt. Next is if you go over any rise in pavement or off a bridge with bad approaches. It will launch you in to a bouncing recovery act, this is just a 35mph, having fun, but never had a car that is so uncontrollable with out shocks, to much grease I guess?Next I am taking tires, drums back off so I can reline all the brake shoes, found 4 sets with rivets, any thoughts about the bouncing ball car, let me know, Bruce
 
Well, you took the shocks off, and then greased the springs, taking away the natural damping factor of the spring friction.

Ford paid a lot for the best shocks, the reason your car drives like that is because you don't have them on!

Put the shocks on and all will be dandy.

Mart.
 
Have done several things to car sense last post, but today I bit the bullet and removed the drivers door. The hardest thing to do was to remove the door strap, it was secured in the rear of car behind the front seat, access was only found with removing rumble seat area trim in trunk area. Very hard to access, I did get it removed. Door pins came out fine, lower hinge was loose in door and allowed drivers door to droop. I loaded door in pickup truck and drove to Don P.'s garage. We removed the door handle, window crank handle and door panel. Found that over the years someone had tried to repair but not a very good job. We will add additional support in door hinge area later this week and re-install door hinge. Like all of these repairs a lot of other things will be addressed, 80 plus years and still not that bad, just nice to have the BEST help,
.

.

.


Don cleaning up hinge
.


Hinges are placed on doors from factory with rivets, the lower ones have pulled through the thin metal, will patch with metal, add a small plate inside door and install 1/4 X 20 bolts with flat, lock and nut
.
 
Last edited:
Removed both door inside window trim today, front windshield trim both sides, top of windshield header trim and last but not least the dash. Going to send off to have the metal parts wood grained.
.

.
Dash removed
.

.
 
Last edited:
Photos of broke rear main shaft bearing in the 34 transmission, have ordered a replacement. Any idea why? Age?
.

.

.

Rebuilt a WG T9, much like the spur gear four speed used in Ford pickup/trucks, and found the rear ball bearing had neatly split the outer race completely in two. Much neater parting than this one.

Good job on the progress so far!
 
Thanks for comment, Don P. keeps me motivated, need to learn all his skills, here he is working on the Drivers Side Door yesterday repairing for me. I was working on water leaks from thawing pipes at Church Building over in WV. Great work, will bring door back and test fit, I am sure this will correct a dropped/drooping door.
.
before
.

.
Work on correction
.

.

.
Door Windows trim holes were made to large with 80 years plus and big screws, welded up and drill out for small correct screws, will need to do other side in future.
.
 
Replaced the door Don repaired, I found that over the years with bottom hinge loose that the hinge itself had bent. Don is going to remove and straight them. I am going to remove the windshield now that I can access the screws with the header trim removed, hope I can salvage the frame and have chromed.
.

.

.
Let me know if you have any ideas of removing the Glass!
 
Removed the seal material from top of windshield today, it was probably some kind of duct seal material is all I can figure, it was hard as a rock, chipped out with straight blade screw driver.
.

.
After cleaning the top grove on windshield I removed the top screws across the header. I took a multi-tool (electric handheld ) and cut the old seal away from windshield. Did not know what held the bottom of windshield in place/tight, it did not have any fasteners. Need to know what should have been in the lower section. The windshield was not rusted or rotted,(painted black) still had a little chrome on the frame and I hope to clean and have re-chromed. Let me know how to remove the glass from frame, thanks Bruce
.

.
 
Boy you have made yourself a lot of work. Going to be very nice when you get done.On your glass unless you want to chance cracking it I would suggest you find an auto glass outfit. I doubt that they will give you any guarantee that they will not break it tho. You might ask them for ideas or try cutting the glass free using an exacto knife,best I can think of. Might be easier to cut if you don't try to soften the rubber.
 
B-O-B, got it done, traveled down to Don P.'s this morning, unloaded the windshield and placed on the table in Don's garage. First we took two small screws loose on each side of the frame. (screws came loose easily) next we took a small wood block and tamped the top section loose from glass. Glass had the old black cloth tape between glass and metal frame. Next we tamped the sides loose with wood block and then the bottom. This section of frame is welded in each corner. Continued to tamp with wood block and out it came from frame, entire windshield had the black cloth tape on edge of glass.
.
removing top of frame
.

.
top loose and start sides
.

.
complete frame removed, need to clean up and inspect.
.

.
Called a Ford Cabriolet owner in Atlanta after removal to ask about the frame, mine has been repaired and no bottom fasteners to secure windshield, the top has the nuts in the frame. I am going to clean up and drill and install the nuts in lower section of frame and have frame powder coated. I still want to find a nice chrome windshield, keep on the look out for me, any info appreciated.
 
Sent my interior trim parts to Jonathan at Honest Charley's and he has received. He started with inventorying the parts, next blasting all parts and the last word from him was preping the metal. Will have plenty of photos of before and after photos later. I asked and received a sample of wood grain months ago.
.
parts at Honest Charley Speed Shop
.
 
Got my Wood Grain interior parts back, placed one piece on passenger side door to take look at finished work, really adds to car interior.
.

.
Dash
.
 
Last edited:
Hello there you guys, I also had Jonathan from Honest Charley's do the wood grain on all my dash and garnish moldings for my 1937 deluxe Tudor. He does amazing work. The best wood grain I have ever seen!! If you want original wood grain, then Jonathan is the guy to do the job. I will post some pictures of the work he did on my parts as soon as I can. Well just want to say that your car is great.

Thanks,
Lorenzo
 
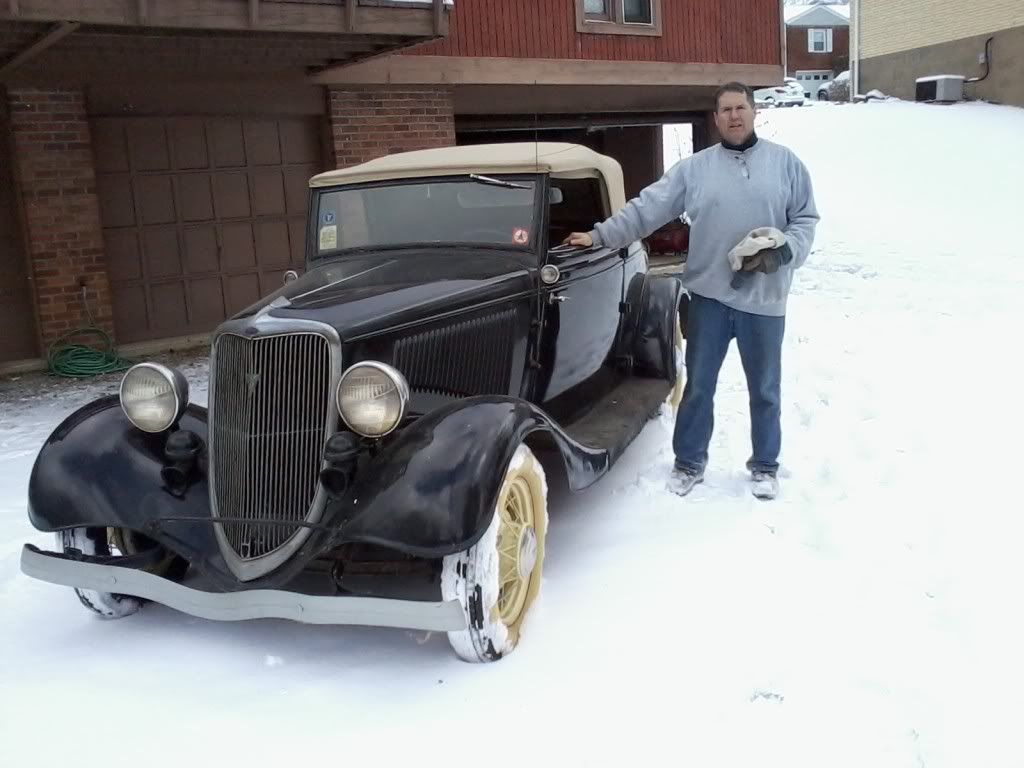
After three years of waiting I drug this home in a snow storm, both ways. 1934 Cabriolet.
Picking up Car, setting/parked sense 1982, all tires flat, aired up (still holding air after two days ) and released parking brake, next out of gear and it rolled.
Photo160_zps95f4d077.jpg

Next push out in snow and winch into trailer, 4X4 needed to back down hills and to location.
Photo163_zpsb0999d7b.jpg

Pulled car in trailer and tied down for trip!!
Photo164_zps5eb38b4e.jpg

Another long trip, snow, clear road, snow squall, clear, snow, clear, arrive home, unload today
Photo168_zps3603fd3f.jpg

Start to work on clean up, plugs out, add MMO, clean interior, etc., will check everything, Don to inspect distributor, clean out carb, gas???
Photo170_zpsf03b1d63.jpg

Wow!! Beautiful car! I want one like that :(
 
Thanks, it has been about one year sense I picked up car and brought home, have worked on just about every part of car, once if not twice. Working on the interior now, this coming year want to drive around. Ordered a chrome replacement windshield for car today. Next winter I am going to start at front bumper and take all the parts off and come out at the rear bumper. Then work on the body and paint. That is the plan, Bruce
 
Before I can install my new Wood Grain interior parts I have to install a new Windshield. Waiting on a new Windshield from Tom Trautwein, sent the old windshield frame to him and now I made a template out of cardboard per his instructions so he can tell the curve of cowl better, frame had been patched over the years. This evening I received a VIDEO sent to me from Jonathan of Honest Charley Speed Shop, here is the link, thanks again Jonathan!!!!
.
http://youtu.be/J_-PsedMvws
 
Back
Top