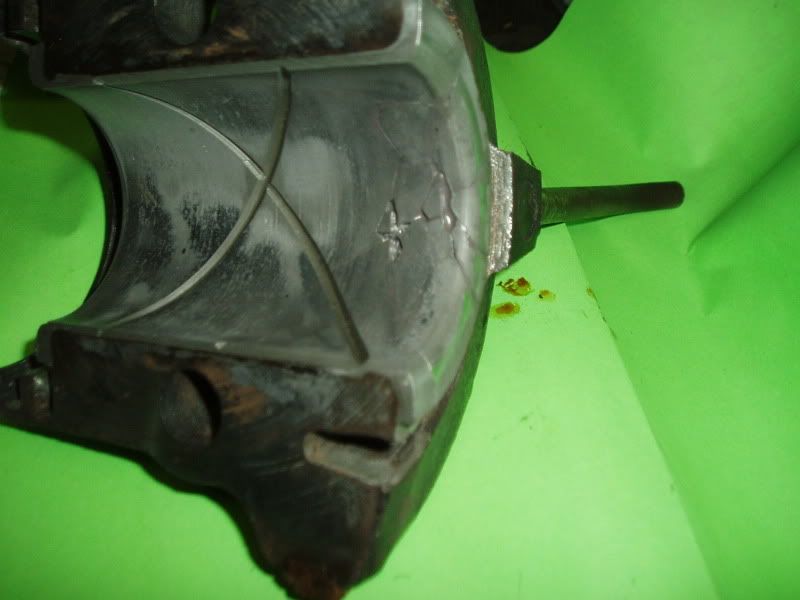
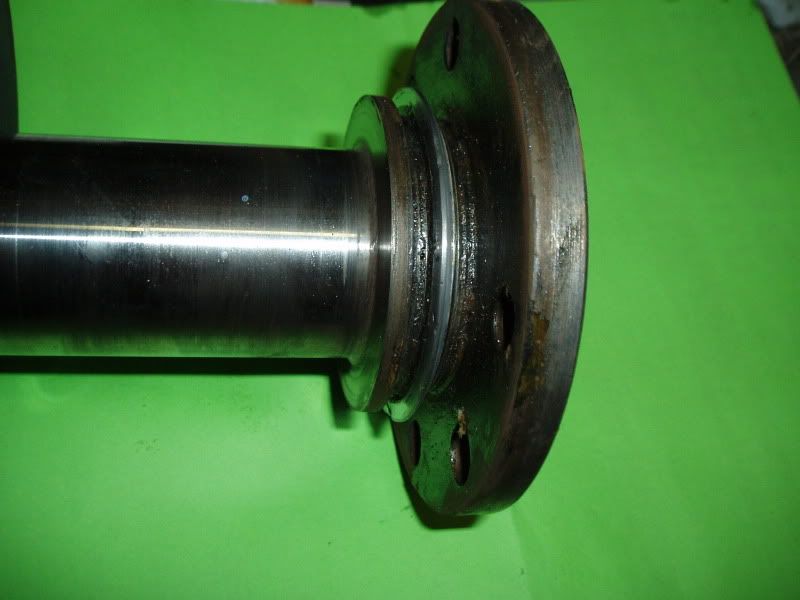
Broken Babbit, what would you do?

Tom, Let us know what you did and how it turned out, thanks.

Still haven't come to a final decision yet. I honed the cylinders today and checked the fit of the old pistons. I wish they would offer .005 over pistons, like in the good old days. And, I don't have my piston knurler here, so we'll probably have to go with a rebore.
 
08752552.jpg


ee8890ea.jpg


I secured the broken babbit with JB Weld and Rich Fallucca replaced the cut down oil slinger by building up the cut off part of the slinger with solder, then turning it to shape on his lathe.

When I removed the rings from the pistons I found most all the wear was in the thickness of the ring, rather than worn ring lands, so we'll reuse these pistons. The engine is a 1929 block, so Mark will look for a late 31 block and I'll put adjustable lifters and new rings in this engine, and Mark will run it for 2 or 3 years, when he will have a 31 touring engine installed.
 
Tom, is there any reason you couldn't fill the voids in the babbit with ol JB? Just wondering, I would be tempted to get it smooth and encapsulate the babbit.
 
Tom, is there any reason you couldn't fill the voids in the babbit with ol JB? Just wondering, I would be tempted to get it smooth and encapsulate the babbit.

Those couple of small voids won't matter and will make extra oil pockets. I didn't want any JB Weld to rub on the crank because I didn't know what it would do to the crank.
 
Well, knowing in advance someone will try to publicly discredit me for making a contribution on this forum, I will nevertheless comment because I think this is interesting. I have seen this exact type of thrust face, and worse, damage "soldered" with salvaged babbitt material. The donor babbitt is melted out of old rods and mains. It is melted into a simple sheet metal trough and ends up stick-, or rod-shaped, and after thorough cleaning and preparation, is joined to the broken or voided babbitt with a huge soldering iron. If done with extreme prep and control, it "wets" well or "homogenizes" with the old babbitt and bonds to the old tinning, if there is any left. Then it is hand dressed and scraped to fit. I have seen this done on "T" and A main caps to repair broken babbitt and to build up thrust faces. I do not know how durable this "fix" is, just thought it may be interesting to you. Yes, Dearies, I know many reasons this could be a poor repair, I'm just reporting that I've seen it done.
 
Well, knowing in advance someone will try to publicly discredit me for making a contribution on this forum, I will nevertheless comment because I think this is interesting. I have seen this exact type of thrust face, and worse, damage "soldered" with salvaged babbitt material. The donor babbitt is melted out of old rods and mains. It is melted into a simple sheet metal trough and ends up stick-, or rod-shaped, and after thorough cleaning and preparation, is joined to the broken or voided babbitt with a huge soldering iron. If done with extreme prep and control, it "wets" well or "homogenizes" with the old babbitt and bonds to the old tinning, if there is any left. Then it is hand dressed and scraped to fit. I have seen this done on "T" and A main caps to repair broken babbitt and to build up thrust faces. I do not know how durable this "fix" is, just thought it may be interesting to you. Yes, Dearies, I know many reasons this could be a poor repair, I'm just reporting that I've seen it done.
I've been working on an engine that this type of repair was done on.It looks like a good solder job and probably held out for some time though not a repair that you would want on a car that did any long distance touring.I guess out on the farm back in the forties you did what you could with what was available.I do find these back woods repairs ,patch up jobs interesting in that they just show how durable the old Model A was for the farmers who had them.
 
I'll bet a lot of these patch jobs were the work of used car dealers back in the day-"patch and peddle"! I grew up in southern Minnesota and my dad said many used car dealers bought cheap cars from Chicago, in the '30's and '40's especially. These cars were really beat and either patched by the Chicago dealer or the local guy. Dad said buying one of these cars was an adventure! You could tell a Chicago car by all the soot embedded in the paint from all the coal smokestacks.
 
I have heard that back in the day plain old lead-tin solder was used to repair babbitt. Those old boys would just melt it in and file and scrape to shape.
 
IMO, I would give Bill Barlow in Bend Oregon a call, without a doubt. If you provide him with accurate dimensions, of distance between the thrust faces, and the throw diameters, he can provide you with any of the caps you need, and they will fit perfectly. The caps that I received from Bill for an engine, were just like a piece of fine jewlery, as I was told by another FordBarner they would be. Shims come with the caps, at the right thickness, and marked for relative positioning. Usually no scraping required.
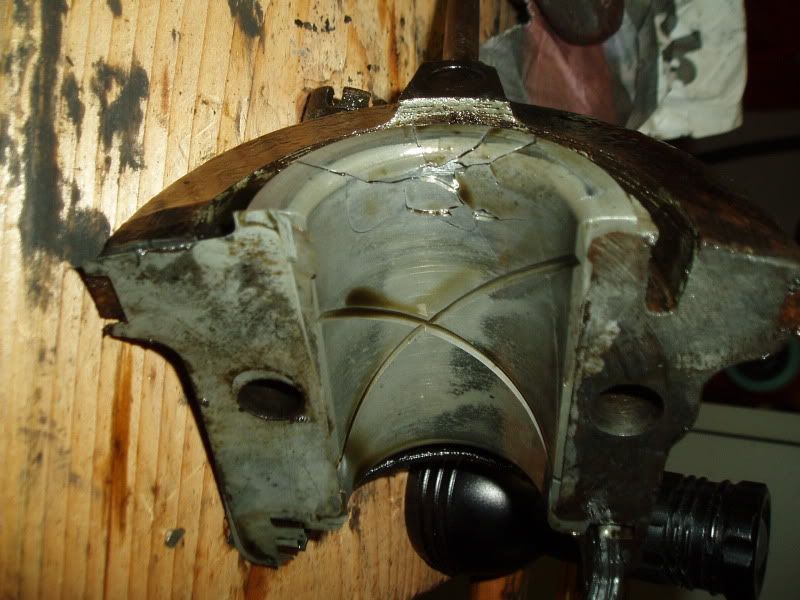
I would second that motion!
 
This post has taken on great interest to me because of similar damage I uncovered a couple of days ago (see the picture in my recent post). There were several approaches to the repair presented; Tom, how did your approach hold up?

Giles in Cincinnati
 
Giles, I've run the engine for 3 or 4 hours in the garage, but the car is still getting painted, so we'll have to wait to see how it holds up on the long haul.
 
3ab34b78.jpg


de988291.jpg


I'm doing a light overhaul on Mark's engine. I took it apart today and found all the babbit to be in great shape, except for this front of the rear main bearing cap. The engine has Silvolite STD. pistons with a little extra slop in the ring grooves, so it'll get new pistons and rings. The valves are all OK, so they won't be ground (or removed, as of now).

Since this is the front of the rear main, and has very little thrust applied to it, I told Mark if it was my engine, since the rest of the babbit is so good, I'd JB weld in the pieces and drive it until it needs a new babbit job.

The cap looks like it was well tinned, but the cap must have been too cool when the babbit was poured, so it didn't stick.

Also notice the oil pockets where the block meets the cap. The pocket on the driver's side ends about 5/8" from the rear and the pocket on the right side ends just 1 3/8" from the front.

The valve clearance ranges from .016 to .019", so we are thinking of installing adjustable lifters. There was some mention of some adjustables having too small of a base diameter. Is that still true today, or are both the single and double nut adjustables OK to use? Thanks

I had the same problem on a 1930 Coupe about 15 years ago, just the bottom rear main bearing cap had the front thrust area cracked when I went to adjust the bearings in the car. I went to a fellow who did babbiting and engine rebuilding for Model A Fords. He had a shelve with about a dozen used rear main caps on it that were in good condition. He measured up my old cap and then found one that was very close in size to mine. He actually gave me the cap and I scraped and fitted it to the crank using Prussion Blue to check it for surface contact. Never leaked oil and that engine is still running strong after 20,000 miles and I just readjusted last year and the bearings are still good.
 
December 2024 - I am posting this for others who need this repair. I had the same problem and called dozens of companies that do Babbitt work. They all wanted me to send them my engine and plan for a long wait. I was ultimately referred to Gene French - GFrench at hotmail.com. He can (and will) do this kind of repair for a single bearing cap (or your whole engine). He has some main bearing caps in stock (for exchange) or can re-Babbitt yours. He will need your crankshaft journal diameter and how much change to thrust clearance you will need. He does beautiful work. I was very pleased with his work and highly recommend him.
 
Back
Top