Rear axle/hub nut torque

Great success!


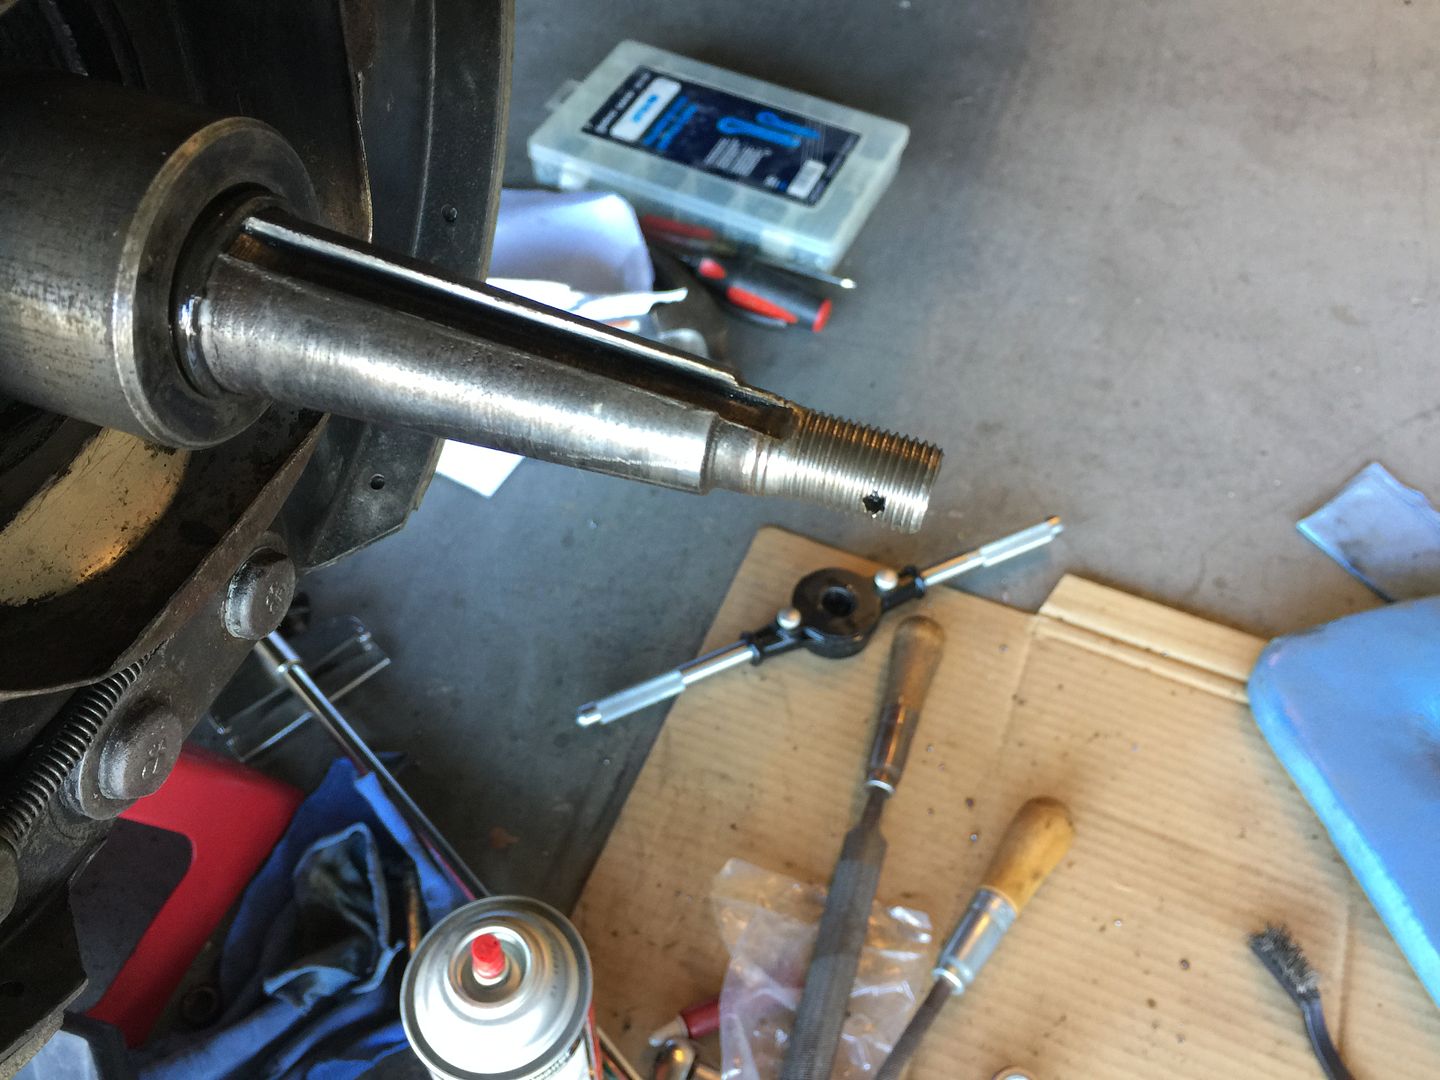
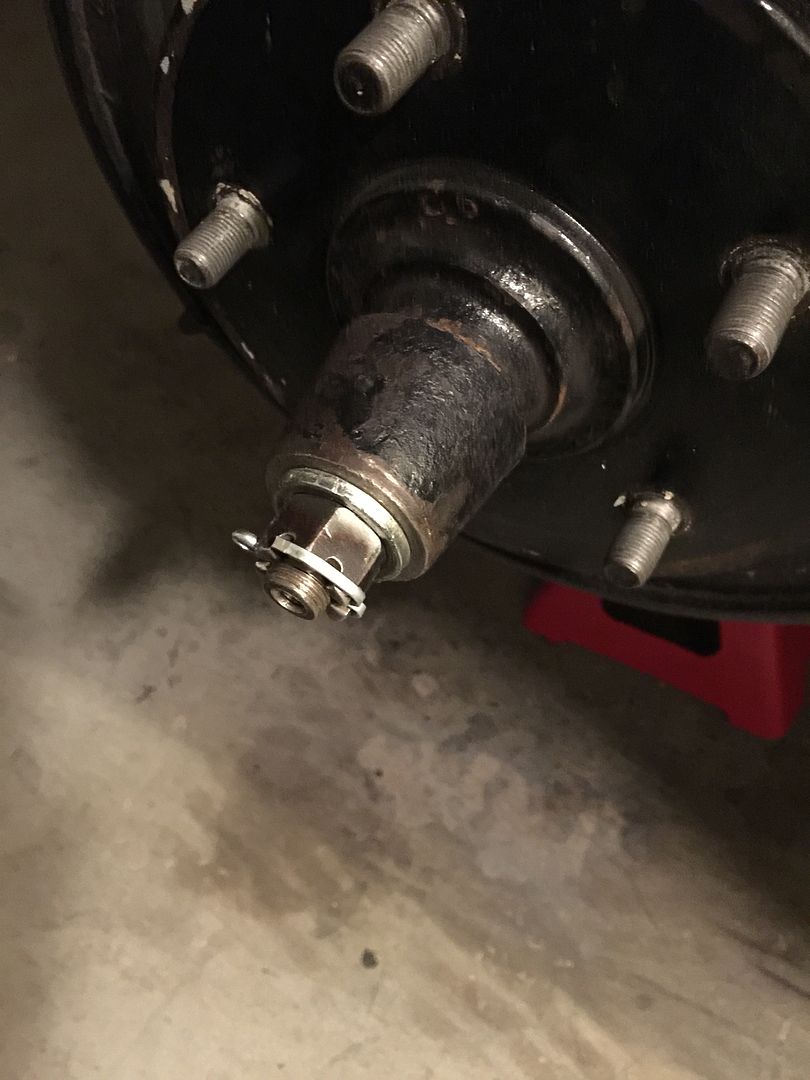
A friend came over and saved the day with a 40 year old Craftsman die set with the proper die wrench and die, and we followed the Fullraceflathead Youtube example and fired up the Henry Ford 40 horse lathe. Went very well, and not too tricky. I found a nice old tall hardened 9/16 castle nut in good shape, and it went right on and lined up perfectly with a window at 80 ft/lbs. Felt very nice torquing too, solid and precise.

I also finished up the Snyder's shock kit installation, which I'll detail in another thread.

One thing to note: In the video, Fullraceflathead filed all the threads off of his axle, taking it down to smooth bar stock, before getting it down to .562; but mine still had visible original thread left at the same .562. So check a bunch of times while filing, it's easy to take off too much material.

Hey Roger,
By your responses, I'm not sure that you get how the mechanism should work regarding the rear axle, the hub, the key and cotter pin.
Check out the idea of LAPPING the axle to the hub...for a perfect fit. This is how a properly installed hub/axle relationship is formed, and how the hub stays fastened to the axle when torqued sufficiently. The key is not for holding the hub from turning, although it will do this duty for a short while , until something snaps if not torqued correctly.

I understand the concept, the fit must be precise and the torque is taken by the hard seating of the tapers, more so than by the key. If I have to get into this rear end in the future, I'll look into the lapping.


Yes, and I nearly ordered one, before the friend came over with the right tools. It pays to have friends with very large tool cabinets.

Are you saying that the axle nuts get a little loose after driving, even with the cotter pins installed?

No, the nut won't move but the hub will creep toward the differential until it finds a home. If allowed to run loose, it will wear the hub and key way. Check it at 50 mile intervals until the nut stops tightening while using proper torque settings.

Good info, I'll certainly check/re torque both sides in 50 miles.
 
Sounds like you know what you're doing. Just don't listen to the knuckleheads that tell you to put anti seize on the taper to make it easier to pull the drum next time:eek:
 
Glad that you were able to get it repaired. Looks nice. Could you post the link to the youtube video by fullraceflathead? I'd like to watch it.
 
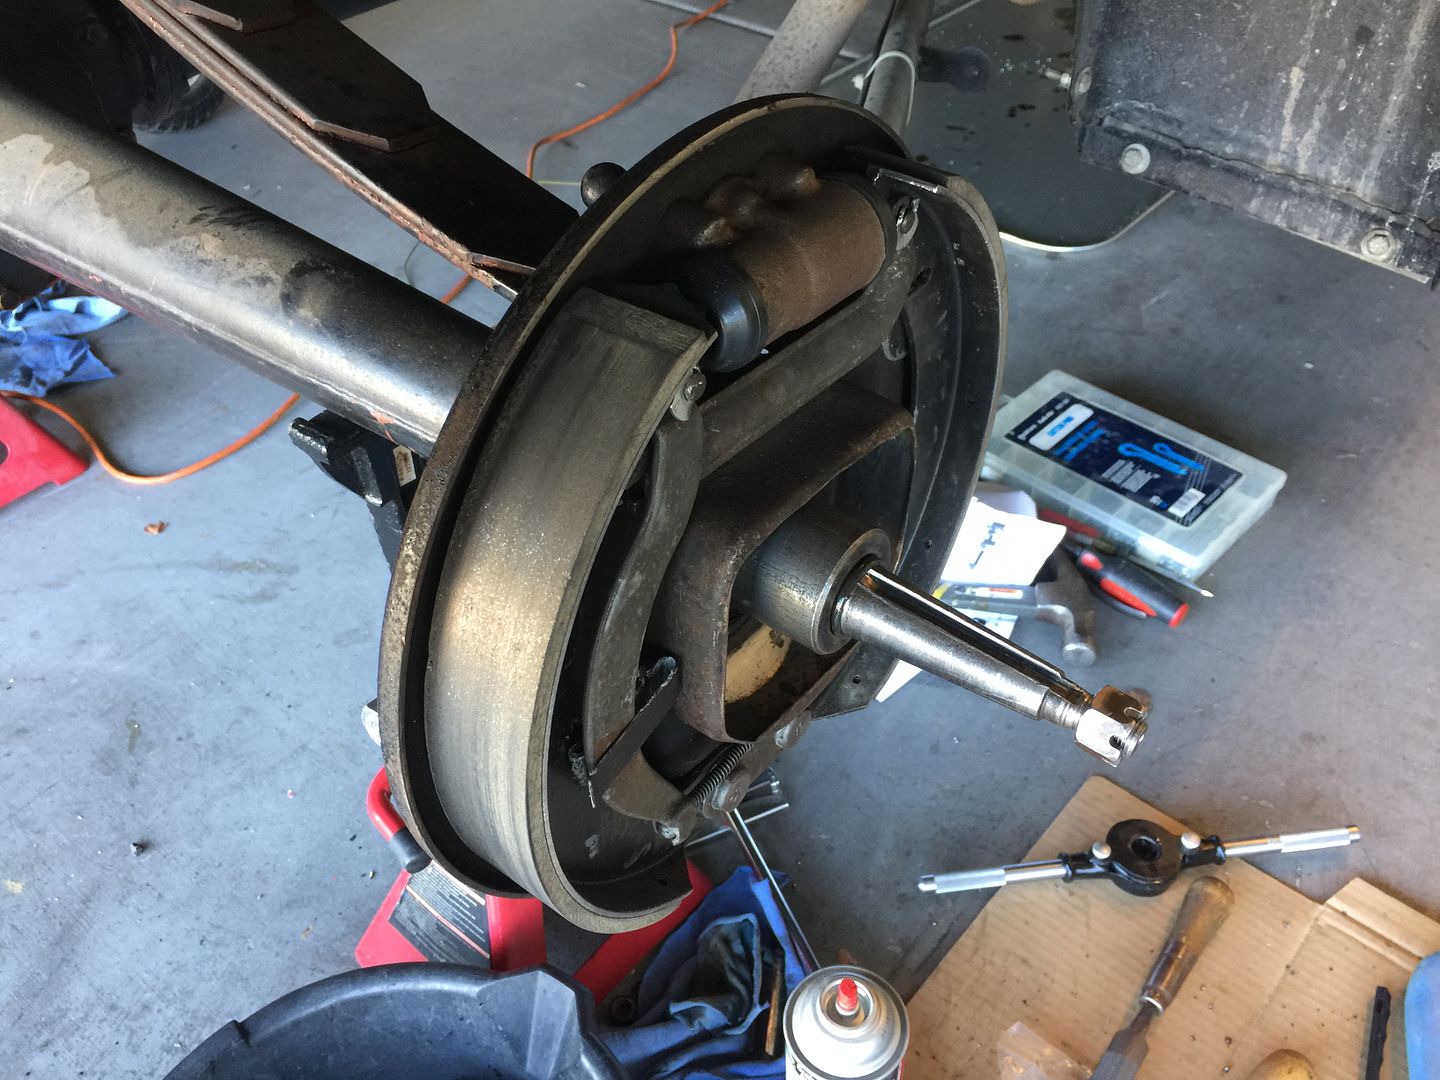
Looking at the pictures, I would be interested in seeing how you've connected the brake line to the wheel cylinder. It doesn't look from the pictures that you have rotated the backing plate the recommended 15 degrees. Maybe just the way the picture was taken. Could you post one taken directly from the end? Or maybe one showing the back-side of the backing plate?

(Sorry if this is a thread hi-jack!)
 
I hope you used a proper hardened washer between the nut and the hub. The picture looks like an ordinary washer. A soft washer can cause the nut to come loose over time.
Good, hardened washers are available from your local friendly "CAT" dealer.
 
I hope you used a proper hardened washer between the nut and the hub. The picture looks like an ordinary washer. A soft washer can cause the nut to come loose over time.
Good, hardened washers are available from your local friendly "CAT" dealer.

This is a very good point. Also please remember to check torque regularly. Out of site, out of mind. Enjoy.
 
Re: Rear axle/hub nut torque-How axle threads get damaged?

Re: REAR brake drums stuck on- How axle threads get damaged

One way that axle threads get damaged in the first place:

Posted on FB 4 years ago:
02-24-2013, 02:07 PM

Re: Rear axle thread stripped-One cause of this ...
For the benefit of others who may not know this:

One cause of stripped axle threads is described below:

It is common to see the first 1/2 inch of axle threads stripped.

I hear folks telling people that this is the way to remove rear brake drums... this method only damages the axle threads.

One thing that causes the damage is that some one loosens the castle axle nut a couple of turns and hammers on the nut in an attempt to remove the hub/brake drum instead of using the correct tool.

As the axle nut is hammered the "castle nut" is deformed on top.

Now when the nut is threaded on the next axle shaft, the nut threads on 1/2 way then binds up when the smashed part of the nut starts to thread on the shaft.

Some folks do not stop at this point ... they just use a longer wrench to force the damaged nut on ... stripping the first 1/2 inch of the AXLE threads.

This is a good reason to avoid the use of an impact wrench to tighten things.

So if you find a nut that goes on nice 1/2 way then binds up, STOP and find a nut that is not damaged and destroy the damaged nut.

NOTE: (If you must use the "hammer on the axle nut" method then remove the nut, turn it around and thread it on with the "castle" toward the inside.)

This practice STILL DAMAGES the axle threads ... just not a bad as has the first method.

I wonder how many times someone drops an axle nut and it rolls under the bench.

"Oh I have one in the can over there". If someone has hammered on this nut and you force it on the axle with a big pipe or impact wrench then the first 1/2 inch of threads on the axle will be damaged.

Over the last 55 years I have seen MANY axles in the parts piles with this damage!
The same thing applies to camshaft gear removal only there is no castle nut involved the threads are still damaged by hammering on the nut.


Last edited by Benson; 02-24-2013 at 02:29 PM. Reason: Correct several typos
 
Last edited:
Question, why would you rotate the cylinder 15 deg's? Except to get to the bleeder, maybe?

"Backing plate", not "cylinder".

Andrew's book describing hydraulic brake conversion describes plugging and re-drilling the mounting holes in the backing plates so that the backing plate is rotated 15 degrees towards the front of the car. This moves the attachment for the hydraulic line and the bleeder forward of the spring mount. While it is not 100% necessary to do that, trying to work around the spring mounts is a total PITA.
 
Last edited:
Glad that you were able to get it repaired. Looks nice. Could you post the link to the youtube video by fullraceflathead? I'd like to watch it.

https://www.youtube.com/watch?v=lC_zIvb1Yuo&feature=youtu.be&list=PLav-W1BC-Nj-T6al6Pk5bcpNJQdDfO5H8

Not sure why it's listed under "comedy"...

Looking at the pictures, I would be interested in seeing how you've connected the brake line to the wheel cylinder. It doesn't look from the pictures that you have rotated the backing plate the recommended 15 degrees. Maybe just the way the picture was taken. Could you post one taken directly from the end? Or maybe one showing the back-side of the backing plate?

(Sorry if this is a thread hi-jack!)

I didn't do the hydraulic conversion. It was done long ago, all home brew stick welded brackets and whatnot. They did a good job, but the car had been sitting for a long time in a collection so I had to go through the whole system and get it working properly. They didn't rotate the backing plates, I wish they did because I had to pull both plates away from the flanges to remove the wheel cylinders in order to rebuild them... and the bleeder screws are directly behind the shock mounts, so close that they had to saw off the nipples; making it so the only way to bleed the brakes is to let the fluid run down the back of the backing plate and axle tube, then hose it off. Messy. Correcting it would have been a pain, so I just left it as is.

I hope you used a proper hardened washer between the nut and the hub. The picture looks like an ordinary washer. A soft washer can cause the nut to come loose over time.
Good, hardened washers are available from your local friendly "CAT" dealer.

It's what was there, a good bit thicker than a hardware store washer. I don't know if it's hardened.

Not sure if this is the video referred to in this post, but here is one with the procedure:
https://www.youtube.com/watch?v=lC_zIvb1Yuo&index=1&list=PLav-W1BC-Nj-T6al6Pk5bcpNJQdDfO5H8

That's the one!

Re: REAR brake drums stuck on- How axle threads get damaged

One way that axle threads get damaged in the first place:

Posted on FB 4 years ago:
02-24-2013, 02:07 PM

Re: Rear axle thread stripped-One cause of this ...
For the benefit of others who may not know this:

<...>

One thing that causes the damage is that some one loosens the castle axle nut a couple of turns and hammers on the nut in an attempt to remove the hub/brake drum instead of using the correct tool.

As the axle nut is hammered the "castle nut" is deformed on top.

Great point. I never hammer on threads, whether they have a nut on or not. Here is what I devised to pull the hubs:

 
Does anyone know where to get the properly hardened 9/16-18 castle nuts.
I can find them on the internet, but only in larger quantities. And the dimensions are somewhat elusive. Concerned about the nut being tall enough to reach the hole for the cotter pin.
I see Bratton's has castle nuts that advertise as being Grade 5, but also read that the 'vendors' nuts are a bit loose. Also read that someone uses ARP nuts, but don't see them offering castle nuts.
Thanks in advance.. just found out today that threads are stripped on my truck. Arghh
 
Thanks for the link to the video(s) Very informative. Hope that I never need to do it but nice to know how simple and effective it is.
 
Just think about the damage done to the hub and carrier bearings when using a rattle wrench or hammer on the end of the axel.
 
I use this type of hub puller:
 

Attachments

  • hub puller.jpg
    hub puller.jpg
    3.7 KB · Views: 110
If the axle hub has been properly installed and torqued it will come off with a loud POP. Not like pulling or pressing a earing off of a shaft. The POP is quite audible.
 
Back
Top