The whole car was restored except for the gas tank, is it easy to remove the tank from the 1929 Coupe? Do most radiator shops clean and seal the gas tank? The reason for the tank to be cleaned now is because the Carb did get dirt in it causing the car to stop running today on my pleasure ride.
You are using an out of date browser. It may not display this or other websites correctly.
You should upgrade or use an alternative browser.
You should upgrade or use an alternative browser.
The Gas Tank?
- Thread starter 1929
- Start date

ocpd44
Junior Member
I just got my '31 Coupe back from the mechanic (had a timing gearnreplaced) today and he mentioned the fine particle rust clogging my jets. As an interim fix, he suggested an inline filter. Of course ultimately, the tank will have to be pulled and rehabed. Interest in hearing the answesr to your questions.

Tom Wesenberg
Well-known member
Do a search for "dirty leg" on this site and you will find pictures of an easy to make dirt trap off the bottom of the tank. I'd clean the tank in place, then use something like this before I'd pull the tank on a nicely painted car.

Fred K-OR
Well-known member
I think I would try to clean out your tank first before you try to take it off. I think you will find a number of treads on this site that mentions how to do this. Then make sure you have the filter on top of your on/off gas valve. Then make sure you have a good filter in your carb and also you filter on your fire wall. This may take care of your problem.
But if it does not, then yes you can take the gas tank out of your rig. Not an easy job but a doable job. You then may find a shop that will clean it and seal it for you. But you can also clean it yourself and get a seal kit from one of the vendors and seal it yourself..
Good luck
But if it does not, then yes you can take the gas tank out of your rig. Not an easy job but a doable job. You then may find a shop that will clean it and seal it for you. But you can also clean it yourself and get a seal kit from one of the vendors and seal it yourself..
Good luck
Larry Jenkins
BANNED
Tom..Do a search for "dirty leg" on this site and you will find pictures of an easy to make dirt trap off the bottom of the tank. I'd clean the tank in place, then use something like this before I'd pull the tank on a nicely painted car.
My tank stands alone. Not installed yet. Do you think that boiling it out in a radiator shop is effective?
Going to have my radiator done this way soon.
Larry
Tom Wesenberg
Well-known member
Tom..
My tank stands alone. Not installed yet. Do you think that boiling it out in a radiator shop is effective?
Going to have my radiator done this way soon.
Larry
I guess it depends on the shop and what they use. A guy in our club took his gas tank to a shop and had it cooked out. It came back with no filler neck.

I've seen enough clean tanks to buy that I wouldn't take mine to any shop for cleaning. If mine needed cleaning I'd use some small hardware and tumble it on a cement mixer, then use the filters just mentioned above by Fred.

CarlG
Well-known member
One of the guys in our club did this same thing, except that instead of using hardware that may be difficult to retrieve once it's done, he used crushed ice. It just melts and pours right out....If mine needed cleaning I'd use some small hardware and tumble it on a cement mixer, then use the filters just mentioned above by Fred.

Manager
Senior Member
This is a post I did on the HAMB when someone asked similar questions.What you see in the first pic is the dirty leg Tom refers to. It works good if your tank isn't too bad. I ended up using a better tank for 2 reasons, the main one you will see at the warning at the end.
O.K. here goes. I am not a tank removal expert but it isn't rocket science. First I disconnected battery, drained tank, removed fuel line ect from under tank,took seat base,side trim panels and floorboard out. Removed the dash rail and the column clamp.

Remove the instument panel and disconnect the wires and speedo cable.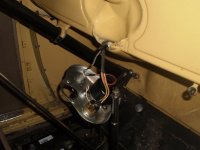
Moving out undo the rear hood hinge bracket and with someone on the other side lift the rear of the hood slide out of the front hinge and remove. Remove the stay rods. Slide the outer tube up the GAV rod and slide the shaft apart and remove the rod from inside.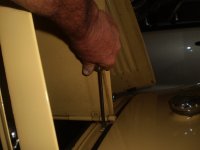
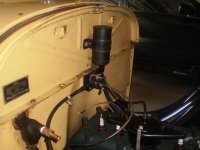
Remove the cover off the terminal box and slide the wiring and speedo cable out of the tank tunnel. Unbolt the coil, I just layed it on the head.
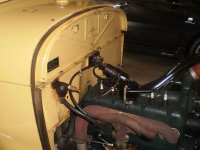
My cowl hood lacing is well and truly glued on so I crefully cut it at the cowl/tank line.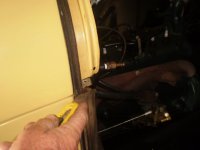
Now undo all the bolts, follow your way around the whole tank about every 6 " there is one. Then slowly lift the tank from the front trying not to damage any lacing. I lifted mine 2" or so and sat a block under it and with a small steel rule (whatever is handy) freed the lacing.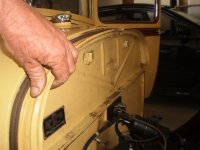
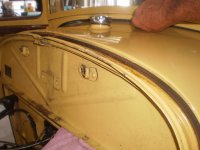
Then lifted it till the wiring tunel cleared the cowl and out she is.
Don't know if anyone is watching but following tank removeal I removed the gas gauge.
I waterblasted the inside as best I could using a straight and an angle shaft and pointing it around the baffles as best you can guess to get as much **** out as possible. I got a lot of **** including some big lumps.
I made a bung for the gas gauge hole and put a bung in the fuel outlet, then filled it with a about 10 to 1 mollasis and water mix. A gallon of mollasis and fill it up. Get the filler in a position that you can get maximum contact with the
top of the tank.
These are a bit hard to see but before
And 5 days after(not the same tank but it was the same before)
Make sure the tank can still vent, this is what happened when I didn't.

After draining the mix I gave it a good waterblast and then about half a gallon of petrol and shook it all around (did that twice) and then some metho and shook again. Will give the yellow tank 7 days this time
Want to know more don't be afraid to ask, but I'm no tank expert and this is just a trial and error method I decieded on after reading numerous things here and on the Barn.
FAQ's Why mollasis? There is varing opinions that though evaporust probably is a lot stronger it may be too harsh .Also it doesn't seem to hurt the paint if you are doing as i am with the yellow tank.
O.K. here goes. I am not a tank removal expert but it isn't rocket science. First I disconnected battery, drained tank, removed fuel line ect from under tank,took seat base,side trim panels and floorboard out. Removed the dash rail and the column clamp.
Remove the instument panel and disconnect the wires and speedo cable.
Moving out undo the rear hood hinge bracket and with someone on the other side lift the rear of the hood slide out of the front hinge and remove. Remove the stay rods. Slide the outer tube up the GAV rod and slide the shaft apart and remove the rod from inside.
Remove the cover off the terminal box and slide the wiring and speedo cable out of the tank tunnel. Unbolt the coil, I just layed it on the head.
My cowl hood lacing is well and truly glued on so I crefully cut it at the cowl/tank line.
Now undo all the bolts, follow your way around the whole tank about every 6 " there is one. Then slowly lift the tank from the front trying not to damage any lacing. I lifted mine 2" or so and sat a block under it and with a small steel rule (whatever is handy) freed the lacing.
Then lifted it till the wiring tunel cleared the cowl and out she is.
Don't know if anyone is watching but following tank removeal I removed the gas gauge.
I waterblasted the inside as best I could using a straight and an angle shaft and pointing it around the baffles as best you can guess to get as much **** out as possible. I got a lot of **** including some big lumps.
I made a bung for the gas gauge hole and put a bung in the fuel outlet, then filled it with a about 10 to 1 mollasis and water mix. A gallon of mollasis and fill it up. Get the filler in a position that you can get maximum contact with the
top of the tank.
These are a bit hard to see but before
And 5 days after(not the same tank but it was the same before)
Make sure the tank can still vent, this is what happened when I didn't.
After draining the mix I gave it a good waterblast and then about half a gallon of petrol and shook it all around (did that twice) and then some metho and shook again. Will give the yellow tank 7 days this time
Want to know more don't be afraid to ask, but I'm no tank expert and this is just a trial and error method I decieded on after reading numerous things here and on the Barn.
FAQ's Why mollasis? There is varing opinions that though evaporust probably is a lot stronger it may be too harsh .Also it doesn't seem to hurt the paint if you are doing as i am with the yellow tank.

Mike V. Florida
Well-known member
This is a post I did...
Nicely done!!!

Lona
Well-known member
Maybe I was lucky. My car sat 19 yrs without running. First, we got the car running using an auxiliary gas tank to prevent getting any crap in the system. I drained the car tank and poured in a gallon of lacquer thinner and sloshed it around by rocking the car vigorously. Then drained the thinner through a filter and repeated the process several times until there was no more junk coming out of the tank. Then put a new pencil filter in the tank outlet, one in the bowl, and one in the carb and ran the engine. It stopped only twice and all I had to do was remove the bottom nut from the Zenith, pull out the needle and remove some of the junk that either was there from the start or had passed the filters. That's a three minute process. It ran perfectly for about 100 miles before the tank pencil filter had to be cleaned. That was about 1,500 miles ago and it has run with no problems since.
The point is that removing the tank is a real PIA, is costly and scratching the restored paint job is highly likely. Sometimes simpler solutions work just as well. Not saying, of course, that removing the tank and having it professionally cleaned and coated is a better long term solution but is the cost, time and danger of ruining a nice paint job worth it?
Glen

HoarseWhisperer
Well-known member
Just finished removing the tank out of a 1928 CCPU for fuel seepage repair at the bracket. Had it done in about 3 hours. Went better than I expected.

Rowdy
BANNED
One tank I was cleaning out developed a hole about half way through the process. I patched the hole and continued cleaning. It looks real nice inside now. If I find a firewall section with the right date range (late March-Mid April 29) likely I will weld it in and use that tank for the delivery. For now I have another tank that was from a fordor it had a couple of pin holes near the filler neck that I soldered and put some filler over the area and some other pits and sanded it down. It is usable and will look OK if I fill the pits on the firewall. If I use it I will change the 1 to a 4 and make the date look close to original. Rod
Last edited:

captndan
Well-known member
A few thoughts here. First I have never cleaned a Model A tank but I have cleaned several antique tractor gas tanks. Granted a tractor tank is easier to take off than a Model A. Keep that in mind. If the tank is on the car there is not much that can be done. Best idea is to spray the inside with phosphoric acid, drain, filter and repeat. Anything else is a waste of time and effort. You cannot coat a tank that is in the car! If the tank is out you're in good luck. Again don't waste time with nuts and bolts or anything else to knock the rust loose. Take the tank to a good welder or do it yourself. Cut the tank apart at the seam with an abrasive wheel. Then sand blast it and weld it back together. A good weld is almost invisible. Pressure test the tank and clean and coat with POR-15. In MHO that is the only way to go. And always carry extra fuel filters.
Well, went back to the location where the car died last night and took out the 33039 filter, which had plenty of rust sediment, cleaned it out, put it back in and drove all the way back home with no problems. The 33039 caught it all without seeing any sediment on the bottom of the bowl.

Mitch//pa
BANNED
Well, went back to the location where the car died last night and took out the 33039 filter, which had plenty of rust sediment, cleaned it out, put it back in and drove all the way back home with no problems. The 33039 caught it all without seeing any sediment on the bottom of the bowl.
That's why we use them to protect the carbonator... Do you have the stand up filter installed on the shut off valve??
Chris in CT
Senior Member
Hi 1929,
You're instincts are correct. Take it to a good radiator shop that is used to custom or antique work and have them boil it out, pressure test it, and silver solder it for leaks and reinforcing the steering column support. An A gas tank should not be welded because it is made of a semi-hard alloy and welding can cause spider-cracks to occur in the sheet metal. If the radiator shop can offer a baked-on internal coating, that is all to the better. Be aware that you will have to refinish the tank after this process is complete. Happy Motoring, and Happy Holidays!
P.S. I see you are in New York. There is a very good experienced shop in Queensbury, NY that can do this work...
Last edited:
That's why we use them to protect the carbonator... Do you have the stand up filter installed on the shut off valve??
I don't think so, but time to take the tank out and have it cleaned and sealed, I guess.

JohnLaVoy
Well-known member
We always recommend cleaning the tank out. We did an article several years ago regarding what needs to be done. We also recommend sealing with a gas tank sealer, we used POR15's product on the sedan and it has held up well all these years. We will be doing another version of the tank sealing in an upcoming issue of the Model A Times since we are doing a Phaeton restoration project.
