

You are using an out of date browser. It may not display this or other websites correctly.
You should upgrade or use an alternative browser.
You should upgrade or use an alternative browser.
Photo from photobucket test
- Thread starter FRANK PKNY
- Start date


Hotrodladycrusr
Senior Member
Frank, if you are going to use Photobucket you don't have to upload the photo to the FB. All you need to do is copy the last line under the photo on the Photobucket site, it's called the image tag . Copy the whole thing. Then come over to the FB and PASTE the image tag that you just copied inside the box here that you type in. No need to click on any icon or anything. Hit enter a couple of times and you can then copy and paste another photo. PERFECT for doing a step by step tech article with photos. PLUS the photos are large. No need for reader to have to click on the photo to enlarge it.
I'll use a couple of my photos from Photobucket as an example
[IMG]http://i2.photobucket.com/albums/y1/MotorCityHotRodder/BIG%20OLDS/BigOldsstatic.jpg
See the white space and words between the photos? That's because I hit enter a couple of times, then typed this, then copied and pasted the photo tag from Photobucket. Took just seconds once you get use to it.
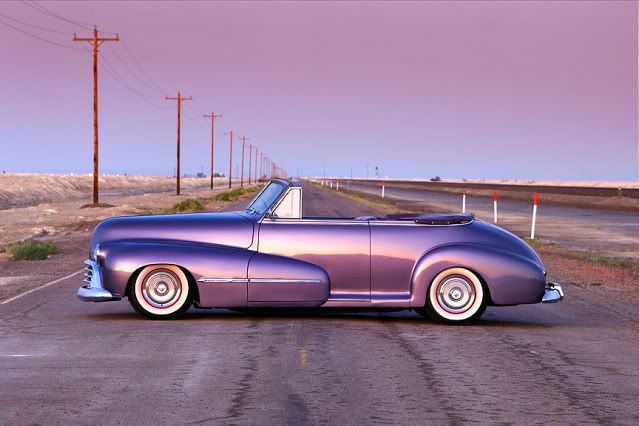
I'll use a couple of my photos from Photobucket as an example
[IMG]http://i2.photobucket.com/albums/y1/MotorCityHotRodder/BIG%20OLDS/BigOldsstatic.jpg
See the white space and words between the photos? That's because I hit enter a couple of times, then typed this, then copied and pasted the photo tag from Photobucket. Took just seconds once you get use to it.

cuznbrucie
Member
Hey, Denise! I like the purple font in your sig! Works well.....
See you in PA this Fri & Sat!
CB
See you in PA this Fri & Sat!
CB


Mike in AZ
Well-known member
Frank, if you are going to use Photobucket you don't have to upload the photo to the FB. All you need to do is copy the last line under the photo on the Photobucket site, it's called the image tag . Copy the whole thing. Then come over to the FB and PASTE the image tag that you just copied inside the box here that you type in. No need to click on any icon or anything. Hit enter a couple of times and you can then copy and paste another photo. PERFECT for doing a step by step tech article with photos. PLUS the photos are large. No need for reader to have to click on the photo to enlarge it.[/QUOTE]
and another way to get multiple large photos(if you don't want to put anything between photos) using photobucket is to check the photos you want to post,,,then click on "generate html and image codes"...then click on "IMG images for message boards"....and poof....i hope....lol....Mike
Last edited:
FRANK PKNY
Well-known member
Thanks for the help, gota love that purple!!!Frank pkny

Roger/Sacramento
Senior Member


Roger/Sacramento
Senior Member
Having trouble. Couldn't add text to previous post. Not sure of some of the explanations above on Photobucket.
Roger/Sacramento
Senior Member


Hotrodladycrusr
Senior Member
Having trouble. Couldn't add text to previous post. Not sure of some of the explanations above on Photobucket.
Looks to me like you are using both Photobucket (your large photo of your hood) and the FB (the smaller attachements) for hosting your photos.
Using photobucket you would type what you want then hit enter
then copy and paste the photobucket image tag right into the white reply box
then hit enter a couple of times to come down a line or two
type some more words
hit enter
then copy and paste another photo
You can continue to do this and include up to 20 images if you want in one reply
Hope this helps
Roger/Sacramento
Senior Member
Trying this again....

Maybe got it this time.Just doing copy & paste

Maybe got it this time.Just doing copy & paste
Roger/Sacramento
Senior Member
Hey Denise, that is one swell looking car. How about a story about it.....please.

Hotrodladycrusr
Senior Member
Hey Denise, that is one swell looking car. How about a story about it.....please.
Glad to see you got the photo posting thing down pat!
I'd sure love to but I don't want to get anyones panties in a bunch since it's not a Ford.
Readers Digest condensed version.....purchased "Project Big Olds" from Steve Hendrickson, editior of Rodders Digest, in 2001 as a project. He had done the frame, and complete drivetrain over a 10 year period and the build process to that point was published at each step in Rodders Digest.
Once I purchased the car I drove it around the country in it's "project" state for about 50,000 miles with no top, interior, windows, paint, etc. In the winter of 2004 is when I started the body and paint work. Drove him around for a couple more years then in the fall of 2007 I did the top, interior and windows. To this point I've driven him over 103,000 miles. I'm pretty proud of that fact.
You're so funny.Is that cookies I'm smelling on Fordbarn? (lol)
Fourdy

I really don't believe I'm going to get as involved here as I am over there. If I had a Ford it might be a different story but at this point all I can do is help the guys with the workings of the site.
FRANK PKNY
Well-known member

Hotrodladycrusr
Senior Member
Good job Frank, looks like you're getting the hang of it!
One more thing though, see how your photo is showing up much lager then the others and a person has to scroll back and forth to see the whole thing? There is a way to fix that in Photobucket......
While still in Photobucket look up where you see the word "Upload Images and Video'?
Right below that is the words "more options" in green.
Click on that.
It will give you options in the size that your photos will post.
You want to make sure you choose "Large 640 x 480" as your image size.
This will give you a nice large photo without being too big where you have to scroll back and forth to view it.
You only have to do this once and all your photos will stay this size unless you go back in and change it.
Last edited: