
You are using an out of date browser. It may not display this or other websites correctly.
You should upgrade or use an alternative browser.
You should upgrade or use an alternative browser.
Mart's three month 33 survivor.
- Thread starter Mart
- Start date


Great work! I would advise one slight change. Cut up another hairpin steering piece and weld one of the legs from it to the one you have going into one of the bottom backing plate bolt holes. Just turn the steering wheel with weight on the front and watch the stock hairpin flex and you will see the need for this mod.
Rebel Sympathy
Senior Member
Mart:
While I do not at all care for your occasional rough and unnecessary vocabulary, uncivilized and unbecoming of a person raised by quality parents with class, I want you to know that I love your posts from a technical sense. They are an inspiration to us all who dread getting "down and under" to tackle issues with our Ford V-8's. I'd wager that little '33 of yours is in good hands.....
Mike
While I do not at all care for your occasional rough and unnecessary vocabulary, uncivilized and unbecoming of a person raised by quality parents with class, I want you to know that I love your posts from a technical sense. They are an inspiration to us all who dread getting "down and under" to tackle issues with our Ford V-8's. I'd wager that little '33 of yours is in good hands.....
Mike
Last edited:

Mart
Well-known member
Mart:
While I do not at all care for your occasional rough and unnecessary vocabulary, uncivilized and unbecoming of a person raised by quality parents with class, I want you to know that I love your posts from a technical sense. They are an inspiration to us all who dread getting "down and under" to tackle issues with our Ford V-8's. I'd wager that little '33 of yours is in good hands.....
Mike
Yeah, Mike, please bear in mind these posts were cut and pasted in from a much smaller forum visited by people I know personally. Hence the robust language. You will also note the strong language also follows a particularly stressfull or difficult part of the job. I did re-read through and thought it was not particularly suitable for this forum, but it was work enough to cut and paste it all in, let alone re-edit it all.
I don't quite know what my parents have to do with your opinion, I'll give you the benefit of the doubt and think it's me you have a problem with, not them.
Mart.
Rebel Sympathy
Senior Member
Thanks, Mart. I understand about the comments I made about your parents. I should not have gone there.....
Thanks for a great series of articles. Very informative. Very inspiring to us lazy V-8'ers.
Mike
Thanks for a great series of articles. Very informative. Very inspiring to us lazy V-8'ers.
Mike

hardtimes
Well-known member
Hey Mart,
Whew..read the whole thread ,just now, and learned a LOT about how to tackle some of my 'similar problems'...with your innovation and use of basic tools (that's all I possess,eh)! I sure could use youse right about now to tackle the f@#@#@#d up mess that I just got! You are my inspiration to get her done..thanks!
Whew..read the whole thread ,just now, and learned a LOT about how to tackle some of my 'similar problems'...with your innovation and use of basic tools (that's all I possess,eh)! I sure could use youse right about now to tackle the f@#@#@#d up mess that I just got! You are my inspiration to get her done..thanks!
Mart
Well-known member
Cheers Lads.
Here's a little update - when I say "Bonnet" you guys say "hood"
Ok, so I've been away for a couple of weeks, and still havn't completed the registration process. I have to take the car for inspection next Tues, so after that things should move along better.
A couple of things to update:
I finally managed to get a 2nd ignition set together. I had to keep borrowing the good ignition setup off Old Rusty. In the end I used the dizzy off the 59A, set up with a single set of NORS points, NOS genuine flatty wires and a crab cap. I did set it up with a really pretty red crab cap, but it wouldn't fire and run. It was popping and banging and trying to run backwards. Careful inspection of the cap showed a crack internally between the king lead input and the No.5 terminal. Substitution of another cap fixed it. Not driven it properly on the road yet, but it sounds all right in the garage.
Next job was to work out how to fill the hole in the roof.
At Chimay I inspected Simon's 34. He filled the roof with a vinyl covered steel insert, sikaflexed in. He said he used some instructions from Kev Elliot in Custom Car, which said use a mk1 Astra bonnet, turned front to back. He said he couldn't find a used one so bought a new replacement panel and it worked a treat.
So using that basic idea as a guide I thought I'd give it a go, but start from first principles.
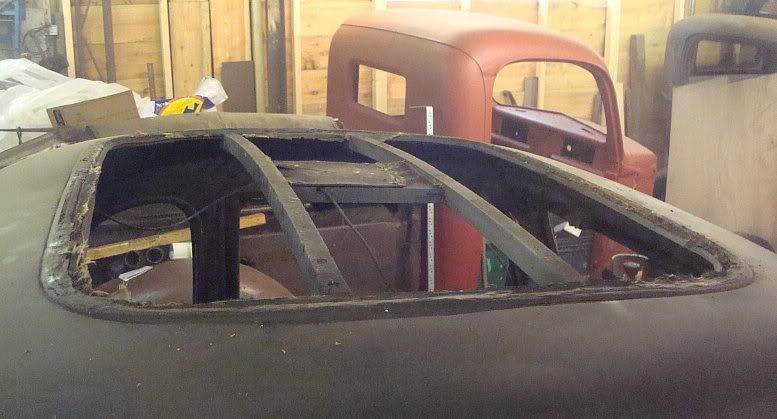
Here's the roof opening with the wooden bows still intact. These are worth keeping because you tack the headlining to them.
I wanted to make a template to show the curvature of the roof. I had a brainwave -
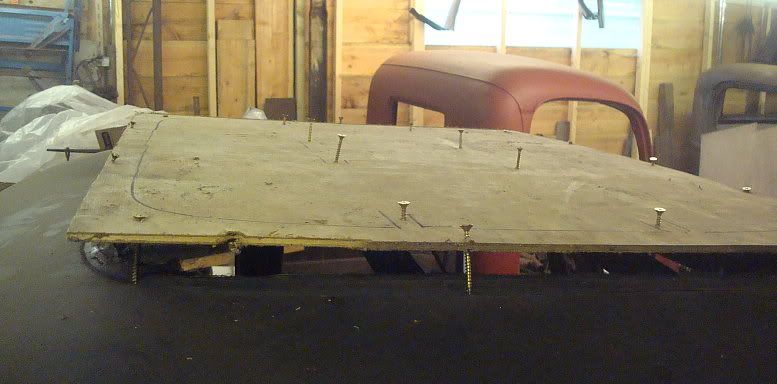
That's it - use a piece of ply with screws screwed through until they just touch the metal surface, or the wooden bows. This worked really well, because each screw is finely adjustable, plus it was cheap and quick to make.
I took it to the local scrappy (Mick Merrill for anyone local) and tried it on various bonnets. Why bonnets, I hear you say, and not roofs?? Well, two reasons, if a bonnet will do it, it's easily removed and transported, plus the cars are stacked two high so the lower roofs are inaccessible and the upper level too high. Bonnets are easy.
So around I went, trying this and that, and there were only a few with an area big enough, without flutes or ridges, and only really one, that came close to the profile as dictated by my super accurate template.
Mondeo. Not the early one, the later one styled more like a focus. The bonnet was a bit damaged at the front so he let me have it for nothing. (top bloke Mick).
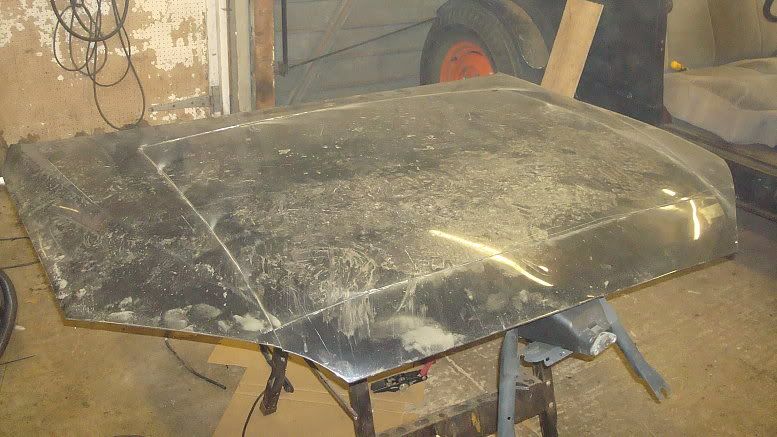
Here's the bonnet at home
And with the template in place, though it's hard to show how well it fits.
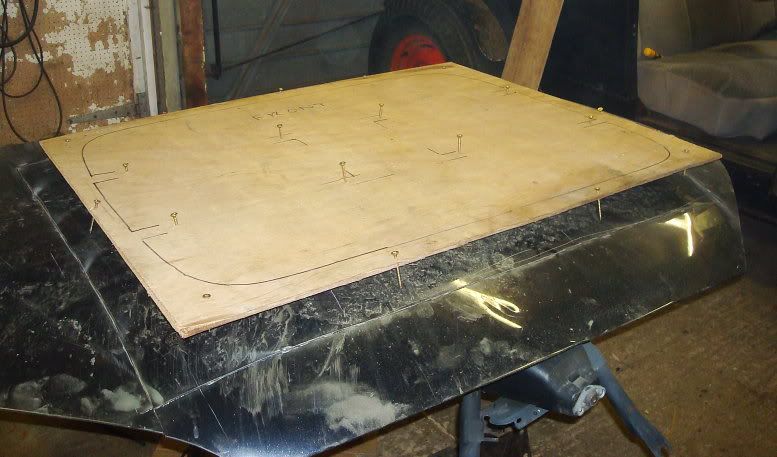
Like Kev found, it fits better back to front.
I cut through the outer skin and chopped out the inner panels. I had to carefully trim the inner panels so I could break the gluey blobs holding inner and outer together.
A few pics:
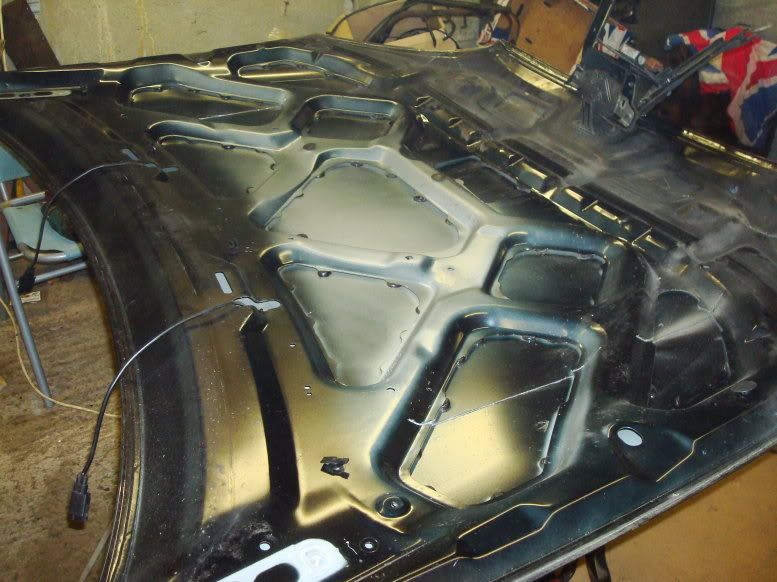
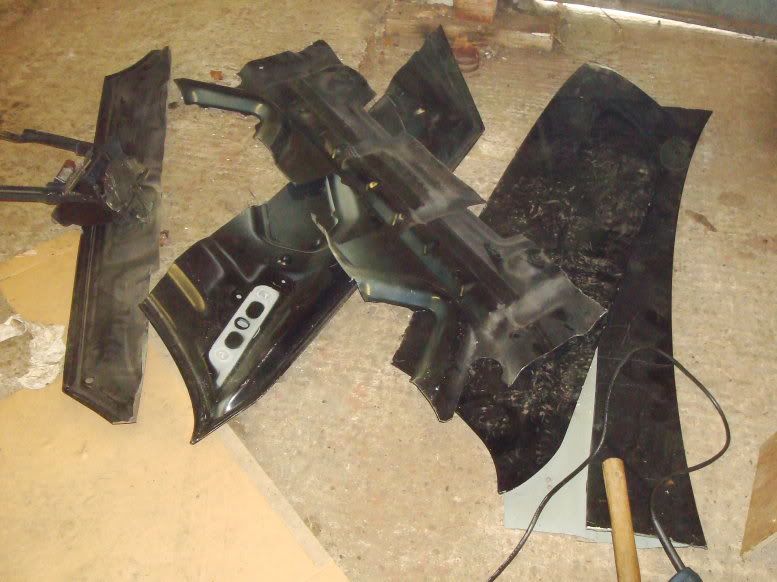
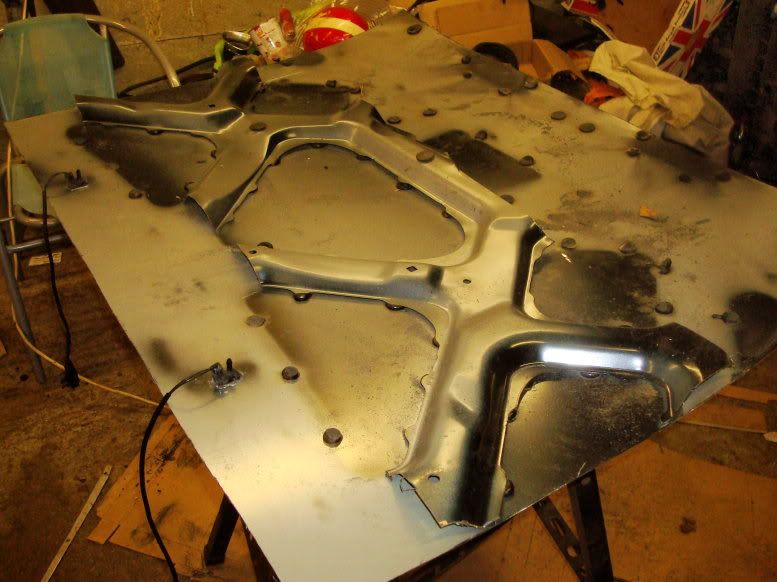
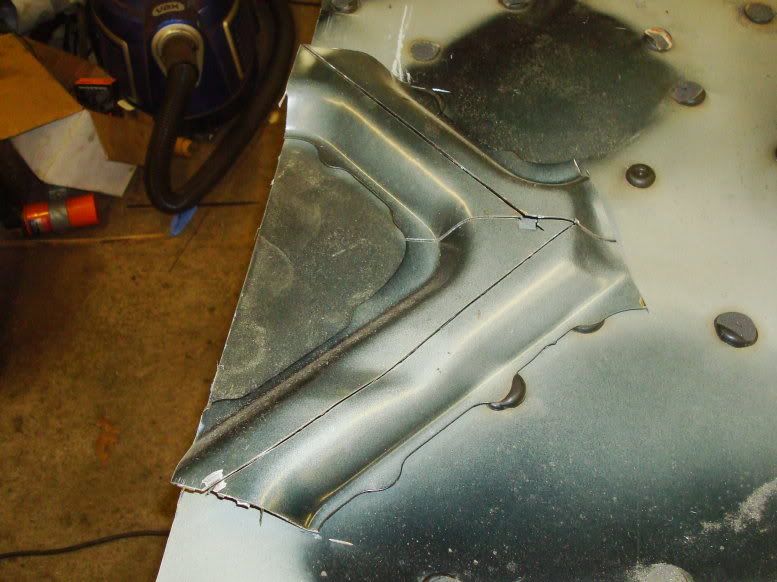
I then removed the gluey lumps with a chisel and reduced the residue with a scraper.
Then I slung the panel on for a test fit.
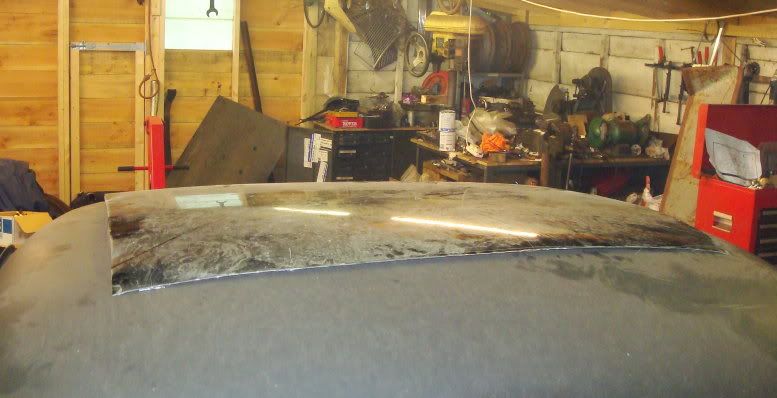
Not bad, not bad at all. Pretty good really.
I drew around the opening from the inside and then trimmed around with a generous allowance, leaving room for a final trim.
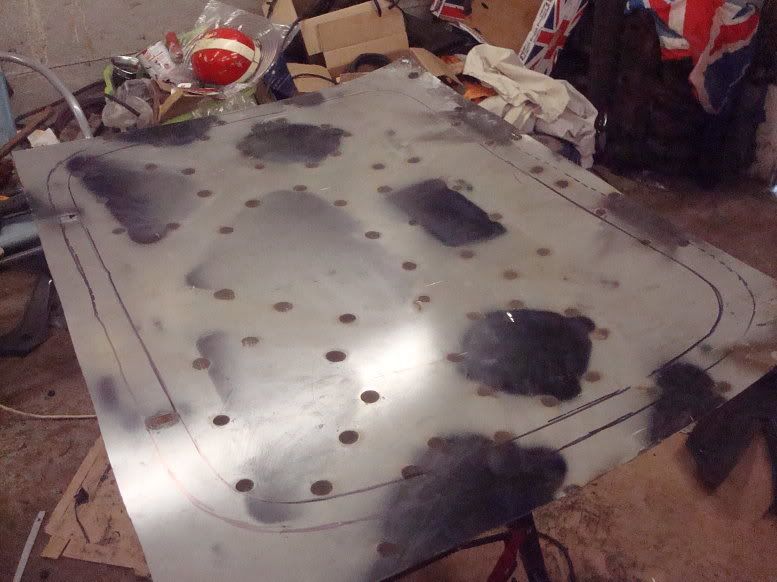
I then really studied the roof opening and worked out what I had. There is a hidem type metal band around the opening, with two screws and nuts at each corner. I removed the nuts and pried the banding out. It comes out in three parts. I removed the remnants of the canvas top material. The opening is in pretty good shape, the tacking strip seems to be ok.
This is as far as I have got, for now, I have to decide exactly how to attach the panel, whether to make it temporary or permanent, and I need some vinyl to cover it.
But here is a parting shot with the new lid resting in place.
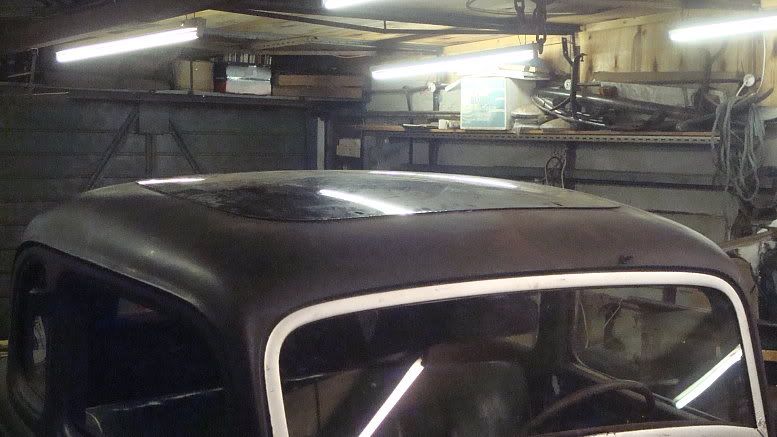
I don't think I could have got a better profile if I had wheeled one up from scratch.
Mart.
Here's a little update - when I say "Bonnet" you guys say "hood"
Ok, so I've been away for a couple of weeks, and still havn't completed the registration process. I have to take the car for inspection next Tues, so after that things should move along better.
A couple of things to update:
I finally managed to get a 2nd ignition set together. I had to keep borrowing the good ignition setup off Old Rusty. In the end I used the dizzy off the 59A, set up with a single set of NORS points, NOS genuine flatty wires and a crab cap. I did set it up with a really pretty red crab cap, but it wouldn't fire and run. It was popping and banging and trying to run backwards. Careful inspection of the cap showed a crack internally between the king lead input and the No.5 terminal. Substitution of another cap fixed it. Not driven it properly on the road yet, but it sounds all right in the garage.
Next job was to work out how to fill the hole in the roof.
At Chimay I inspected Simon's 34. He filled the roof with a vinyl covered steel insert, sikaflexed in. He said he used some instructions from Kev Elliot in Custom Car, which said use a mk1 Astra bonnet, turned front to back. He said he couldn't find a used one so bought a new replacement panel and it worked a treat.
So using that basic idea as a guide I thought I'd give it a go, but start from first principles.
Here's the roof opening with the wooden bows still intact. These are worth keeping because you tack the headlining to them.
I wanted to make a template to show the curvature of the roof. I had a brainwave -
That's it - use a piece of ply with screws screwed through until they just touch the metal surface, or the wooden bows. This worked really well, because each screw is finely adjustable, plus it was cheap and quick to make.
I took it to the local scrappy (Mick Merrill for anyone local) and tried it on various bonnets. Why bonnets, I hear you say, and not roofs?? Well, two reasons, if a bonnet will do it, it's easily removed and transported, plus the cars are stacked two high so the lower roofs are inaccessible and the upper level too high. Bonnets are easy.
So around I went, trying this and that, and there were only a few with an area big enough, without flutes or ridges, and only really one, that came close to the profile as dictated by my super accurate template.
Mondeo. Not the early one, the later one styled more like a focus. The bonnet was a bit damaged at the front so he let me have it for nothing. (top bloke Mick).
Here's the bonnet at home
And with the template in place, though it's hard to show how well it fits.
Like Kev found, it fits better back to front.
I cut through the outer skin and chopped out the inner panels. I had to carefully trim the inner panels so I could break the gluey blobs holding inner and outer together.
A few pics:
I then removed the gluey lumps with a chisel and reduced the residue with a scraper.
Then I slung the panel on for a test fit.
Not bad, not bad at all. Pretty good really.
I drew around the opening from the inside and then trimmed around with a generous allowance, leaving room for a final trim.
I then really studied the roof opening and worked out what I had. There is a hidem type metal band around the opening, with two screws and nuts at each corner. I removed the nuts and pried the banding out. It comes out in three parts. I removed the remnants of the canvas top material. The opening is in pretty good shape, the tacking strip seems to be ok.
This is as far as I have got, for now, I have to decide exactly how to attach the panel, whether to make it temporary or permanent, and I need some vinyl to cover it.
But here is a parting shot with the new lid resting in place.
I don't think I could have got a better profile if I had wheeled one up from scratch.
Mart.
1937pickup
Well-known member
Great pictures, great work and great discriptions-keep them comming.


Roadster5040
Senior Member
Thanks for posting very nice job.
Mart
Well-known member
Quick roundup as good news to report.
Last Tuesday got the old GMC fired up and pressed into towing duty again.
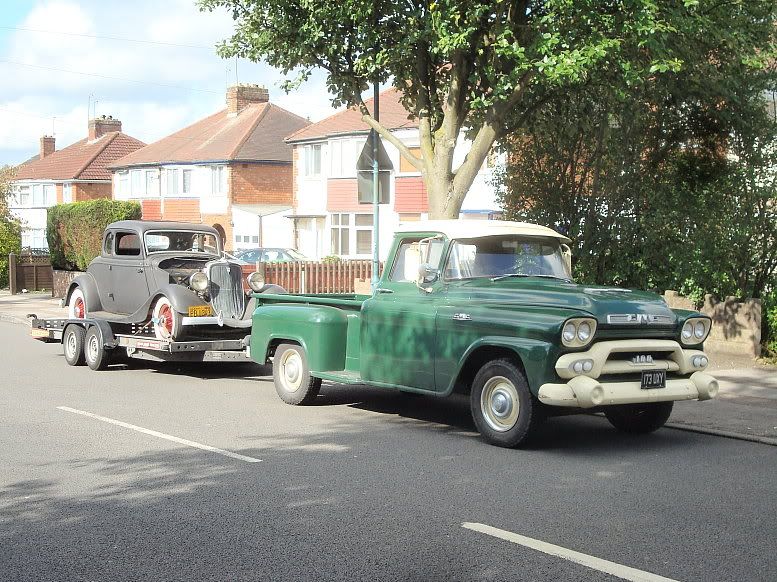
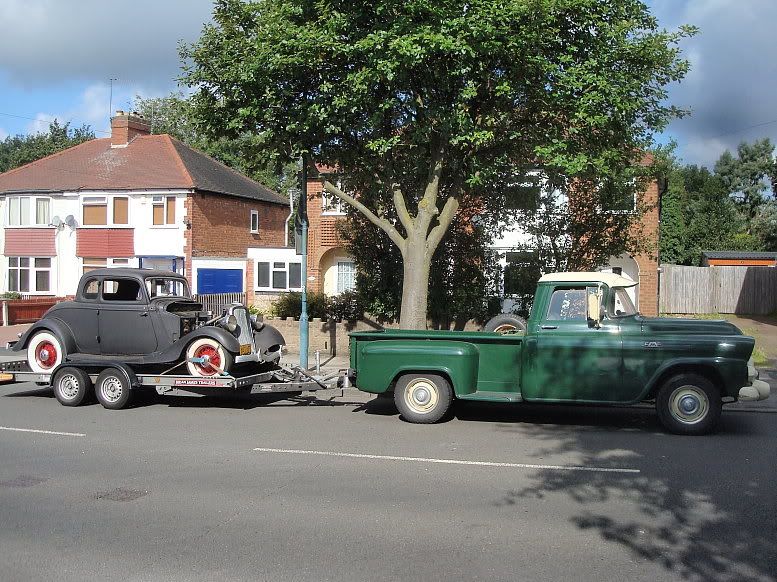
Took the 33 down to the local DVLA (UK DMV) for the requested inspection. I knew this was going to be a formality but it was a hoop I had to jump through to progress the registration. All was well and got back safe and sound, tucked everything away and started waiting for the letter. THE letter.
This morning, normal Saturday routine, took my Mum shopping and when I got back THE letter had arrived.
It contained the form I need to buy the number plates and a tax disc. I never unpacked the shopping so quick.
Straight to a local shop to get some plates - I just got what was available over the counter - something smart will have to wait.
And off for a road test.
I drove all around, first round the short block then round the longer block, then round the 8 mile block, and so on, going further afield each time.
Pleased to report no issues.
I waited what seemed like an eternity for today, and was so pleased to at last be able to drive it. So pleased, I didn't even ****** a video.
All I got was a couple of crappy pics in Tesco's car park.
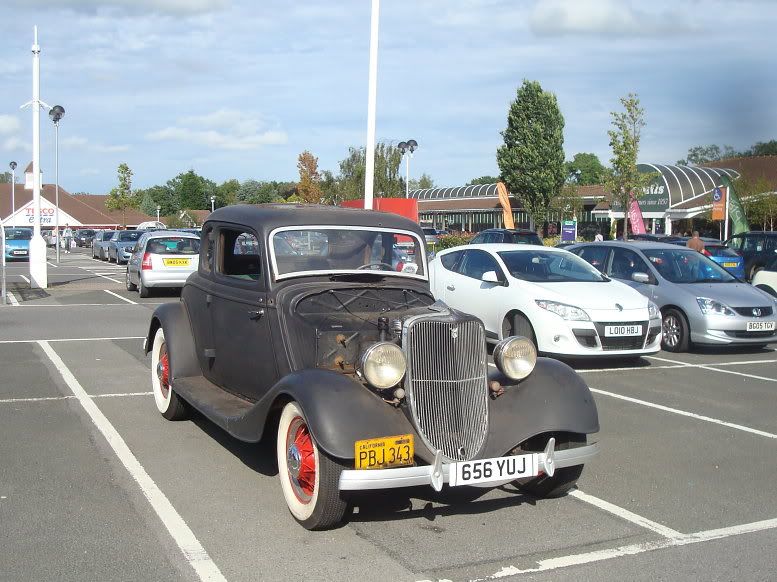
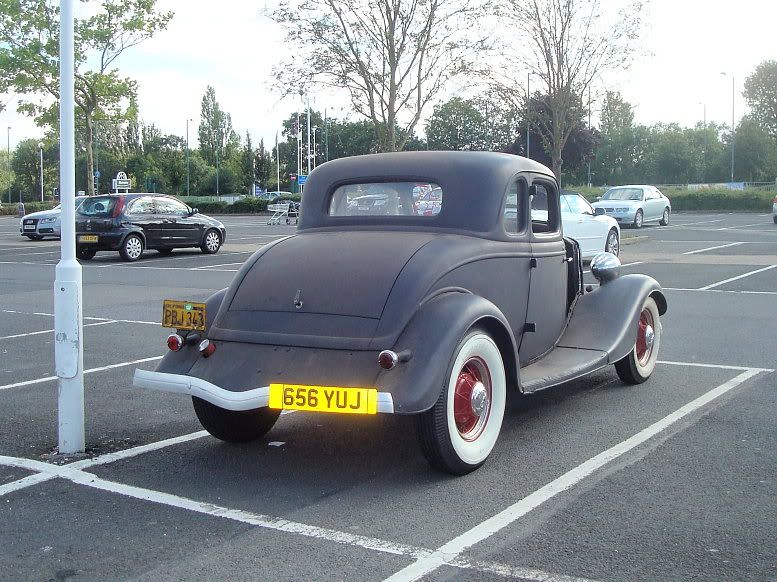
But that's the whole point, they were taken in Tesco's car park. Not in my back garden. And that makes a big difference!
Mart.
Last Tuesday got the old GMC fired up and pressed into towing duty again.
Took the 33 down to the local DVLA (UK DMV) for the requested inspection. I knew this was going to be a formality but it was a hoop I had to jump through to progress the registration. All was well and got back safe and sound, tucked everything away and started waiting for the letter. THE letter.
This morning, normal Saturday routine, took my Mum shopping and when I got back THE letter had arrived.
It contained the form I need to buy the number plates and a tax disc. I never unpacked the shopping so quick.
Straight to a local shop to get some plates - I just got what was available over the counter - something smart will have to wait.
And off for a road test.
I drove all around, first round the short block then round the longer block, then round the 8 mile block, and so on, going further afield each time.
Pleased to report no issues.
I waited what seemed like an eternity for today, and was so pleased to at last be able to drive it. So pleased, I didn't even ****** a video.
All I got was a couple of crappy pics in Tesco's car park.
But that's the whole point, they were taken in Tesco's car park. Not in my back garden. And that makes a big difference!
Mart.

bgarrett
Senior Member
Mart, Thanks for this thread and all the good information. I have been reading your posts for years and you do good work.
The gas tank is going to continue to rust inside and will give you trouble. I have been using the gas tank sealer from POR15 for more than 20 years and recommend it highly. If you have never used it, you will be impressed, watching it coat and seal the tank. I had finished a tank years ago and had set it aside to finish draining the excess sealer, when my young son got excited and called me over. "Papa! Its sealing up the drain hole!" Thats a 5/8" hole it was beginning to seal! Good stuff
The gas tank is going to continue to rust inside and will give you trouble. I have been using the gas tank sealer from POR15 for more than 20 years and recommend it highly. If you have never used it, you will be impressed, watching it coat and seal the tank. I had finished a tank years ago and had set it aside to finish draining the excess sealer, when my young son got excited and called me over. "Papa! Its sealing up the drain hole!" Thats a 5/8" hole it was beginning to seal! Good stuff


Threewindaguy
Junior Member
If it were mine, I would scrap the copper lines and go to steel lines. Safety issue, just saying.....

Blownflatheaddeuce
Senior Member
Well done MArt...loved this thread !!


nitrohonkey
Member
Looks great...I have to agree with ridding yourself of the copper brake lines. Otherwise, very well done!
