59 AB engine rebuild

Hard to say whether the pan should be straightened, if you think you can improve it, give it a go. Don't go mad, a couple of well placed blows should get it straight enough.

The triangular piece is the road draft breather vent. Ford very cleverly incorporated it into the engine rather than as a bolt on. The vent aligns with a passage that has a tube fitted at the top, the open end of which is tucked right up under the inlet manifold.

Mart.
 
Thank you for the info..

I am still in the process of disasemble. I have honed the clylinder walls very lightly and no ridge at top to speak of but the pistons seem to get hung up on the last ring, it will come out most of the way but the last half inch goes harder .I have got four out buy spraying with pb plaster and slowly working it out.
Is this normal?

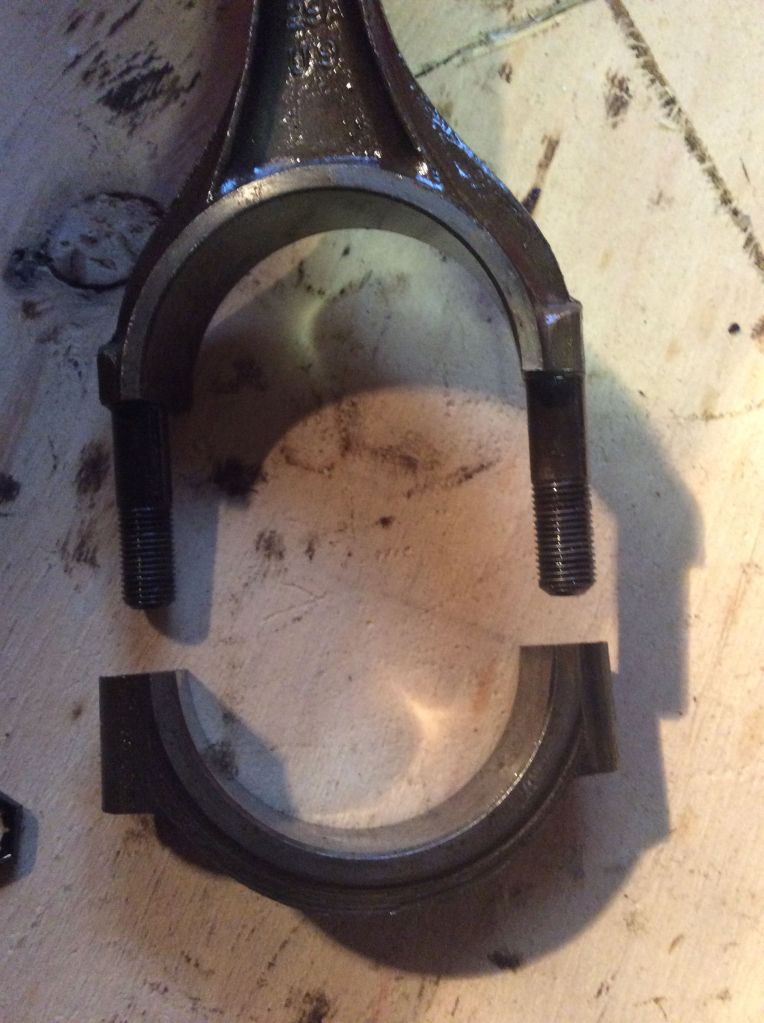
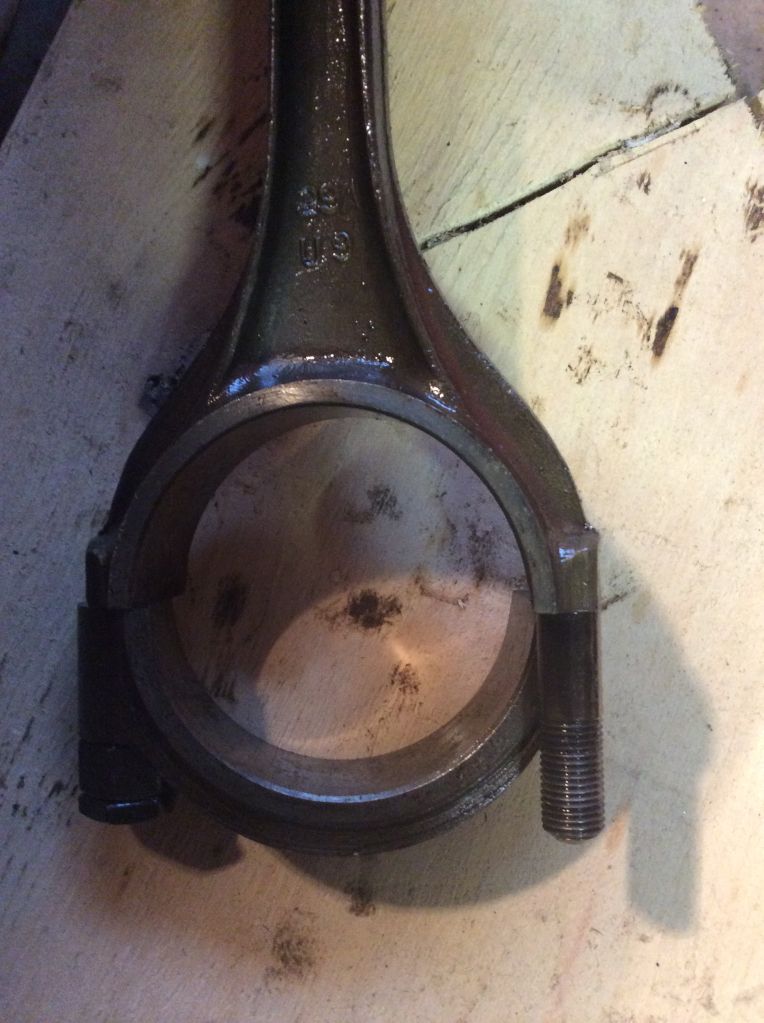
Also a few of the rod bearing caps don't seem to want to go back on after removal am I doing something wrong?

4b7244f77f7cc1f2d89c737a1111b40b_zpsd92a5337.jpg


3d4bbc65182eea7f5c183166d181aaf4_zps383624ff.jpg
 
They will go on, just pull them off and keep trying, have to be aligned straight to go on, sometimes you can rock them slightly from one stud to the other and they will go on.
 
Update I have removed all the pistons and oil pump. To remove the oil pump I had to remove the oil pump idle gear off of the cam shaft gear. The valve lifters are all stuck.

So now I am trying to remove the valves. Again I am working on a 59ab.

I thought I would have the valves for 48 to 53 as seen here
http://www.vanpeltsales.com/FH_web/flathead_valveremoval_tools-1.htm

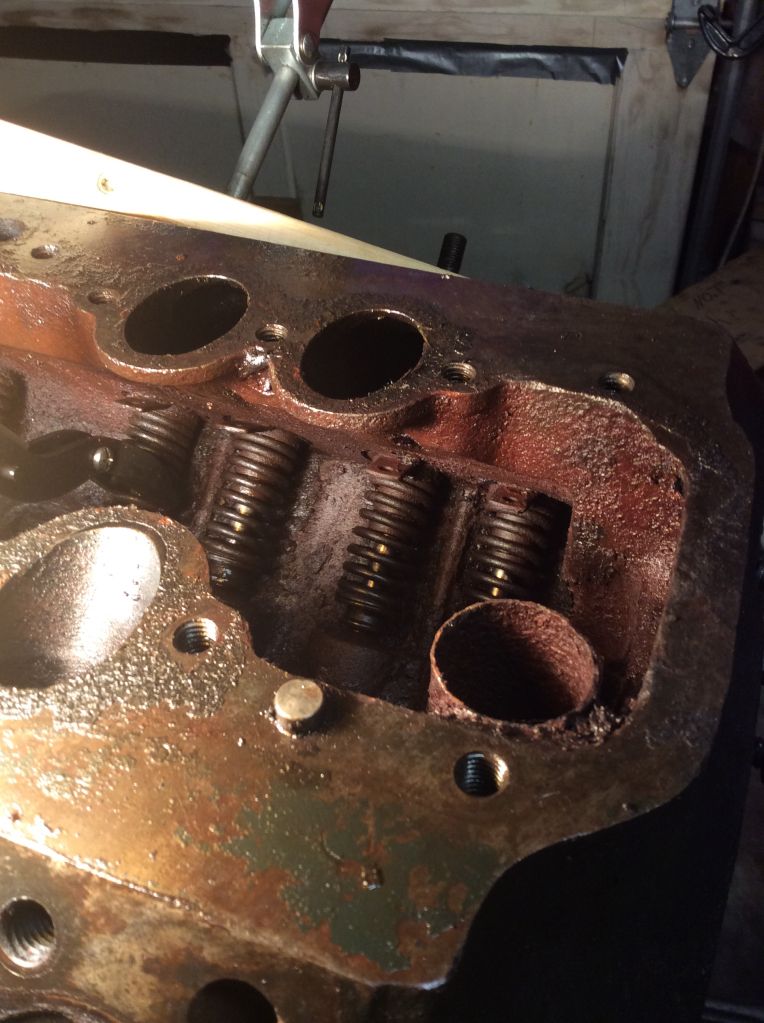
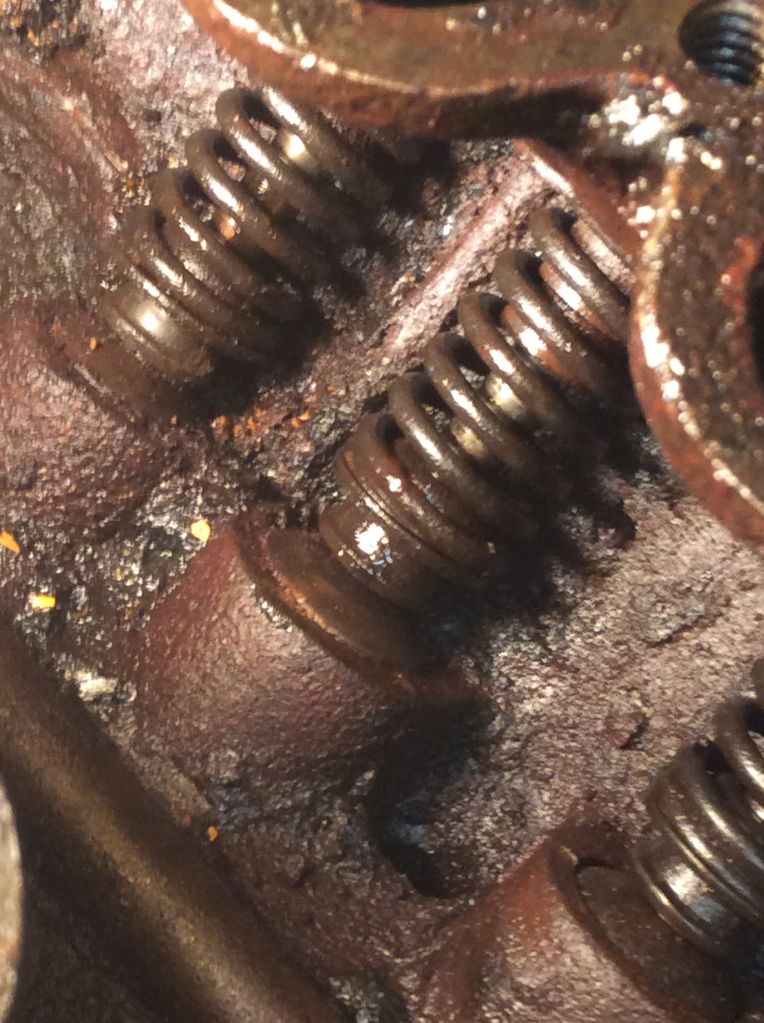
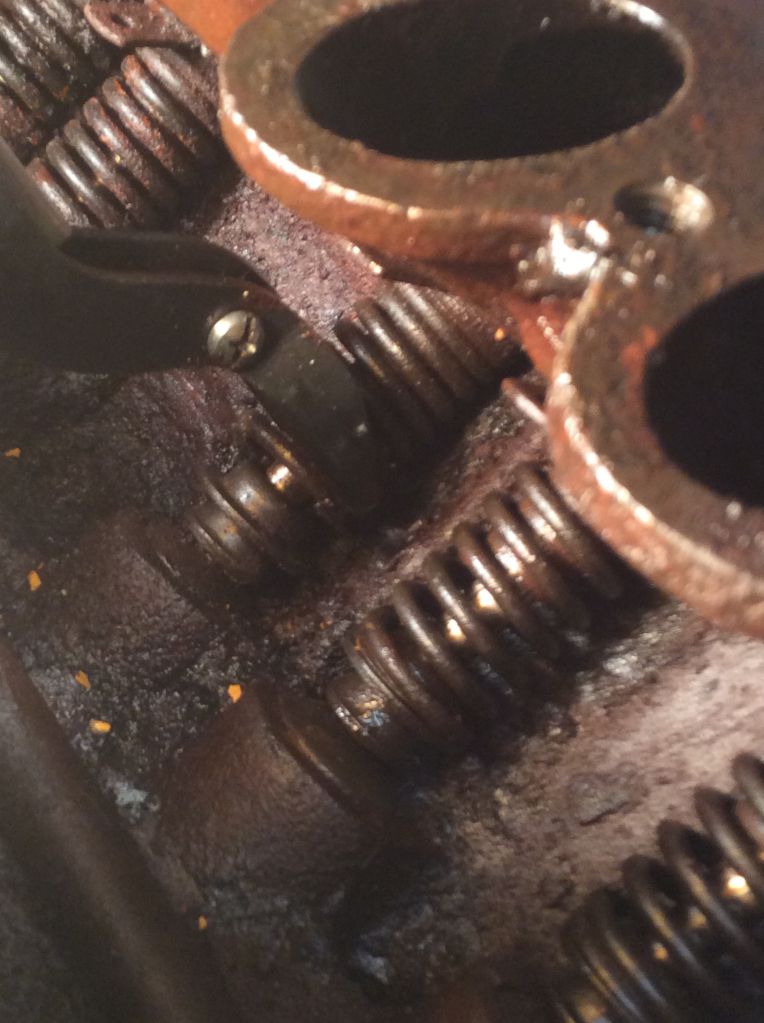
But don't see how to remove the valve sleeve or the locks, I don't see the locks at all.
Here is what I am looking at.
8daef3229c7993782d6d932616cef4cd_zps7bae5f4e.jpg


f4075a50fd9081a9eed7a69179cf322b_zps7be2786c.jpg


d656bd456e59b017eaad54e88f8111ce_zps9c7d1ea6.jpg
 
You pull the valve springs down and pull the top retainer out. From your last photo, you need to be up higher on the spring to get the spring down far enough. It is not that easy, takes some work. Then the guides and spring and everything is removed through the top as an assemble. This can sometimes be very difficult!!! If all else fails you can cut the valve in half and get the pieces out and then drive the guides out. Again, this whole process can be very difficult, took me most of a day on my last engine and I had to cut almost all of the valve. The valve spring keepers (locks) are located at the end of the valve in the retainers (next to the lifters). Have to have the springs loose to remove them. Sometimes they will come out if you raise the bottom of the spring and retainers up with a fairly fast jolt.
 
Looked at the last photo again, you are moving the spring in the wrong direction!! It comes down from the top and the retainer with the tab with the hole in it has to be pulled out. I can't tell from the photos which valves you have, but the only real difference is straight on the stems vs tulip shaped and split vs solid guides. I would guess late model valves (straight with solid guides) but it's only a guess.

Edit: VanPelt says you can remove the retainer from the valve stem and take the valves out through the top, I have never done it that way. I now see that is what you were attempting to do. Looking again, you may have the tulip valves. VanPelt has a procedure for that spelled out also. In last photo did you attempts to pry the part up with a screwdriver that is sticking out below the retainer? It is either the sleeve that the keepers are in or the tulip end of a valve. Should be able to figure that much out fairly easily. If it is the sleeve the keepers should fall out if you pry it up (look at the figure for 51-53 valves).
 
Last edited:
Pulling the valve spring down will not release the guide lock. You need some special tools for doing the job. By the looks of the valve keepers, you have the mushroom stem valves. Makes things harder. There is a notch in the valve guide near the end of the small diameter that is meant to be engaged with a special tool. This is used to pull the guide down allowing the removal of the guide keeper. Then the assembly is pryed upward and out. There is also a tool that can be inserted in the hole in the guide retainer that can be used to pry the retainer out. Probably the easiest method.
 
Last edited:
I don't see how I could have the mushroom style valves the valve spring retainer and the sleeve both rotate/ spin freely around the valve. The valve does not rotate. It seems like the locks might not be coming out or down.
 
Need to tap/bang the sleeve around to get the locks to come out. Looks like you have the late model valve setup for sure if that is a sleeve.
 
I believe you do have the late rotator valves fitted. This is a definite plus when it comes to dis-assembly. The conventional way of pulling the guides down, pulling out the horseshoe clip and then withdrawing the whole assembly as a unit is probably best bypassed in this case because the guides look like they will not move easily enough for that to happen.

Get your valve tool behind the small retainer at the end of the valve, lift it (you might need to tap the valve head gently to break the taper) and the collets should come out.

Then withdraw the valve, tap the guide down a little way(using a long socket or similar), remove the horseshoe clip and pull the spring and guide up and out of the block.

Piece of cake.

Mart.
 
Thanks for the help. All good things to know.
The reason I think I have the later valves is that the spring retainers don't have a notch in them. They are perfectly round.
The sleeves don't seem to be moving up or turn on the valve stem like I first thought they were.
 
Hi Mac, it would be much easier getting the locks out if you had "straight" fingers on the spring compressor!

Without the correct fingers it's difficult getting the angle with the tool to grab the springs up high!

Thanks, Gary in N.Y.

P.S. Here's a shot of the springs being compressed, actually takes only about 5 or 10 minutes or so to get all the locks out. Of course the air-operated compressor makes it a little easier also!
 

Attachments

  • Flathead Spring Compressor.JPG
    Flathead Spring Compressor.JPG
    78.3 KB · Views: 193
Absolutely forget what you see in the manuals; it ain't coming apart that way. You have years of carbon and sludge locking the whole assembly together, not to mention water damage. For that condition engine no special tools are required. A piece of rebar or round stock heated on the end and flattened out with a groove ground in it, a hammer, a screwdriver, and a socket/punch slightly smaller than the valve guide bore is all that is required. Pry the valve spring up and hold it there, hit the head of the (raised) valve with a hammer, this will knock off the locks. Sometimes one will stick, repeat or use screwdriver to tease it off. Remove valve spring prying device. Place crowbar under head of valve and pry it out of the guide. get spring and retainer out of the way. using suitable socket/punch drive valve guide down the bore into valley. Once you do one or two you will get the hang of it. Start with easy to access ones; save difficult ones for last.
 
Once I've made the decision to replace the valves, guides, etc. (which is an easy decision to make), then some level of 'violence' usually comes into play. :eek:

This is especially true with older flatheads with mushroom stems and split guides - nothing for me to ponder saving.

With later one-piece guides and 11/32 stem valves, sometimes you can save them, but if they are frozen, rusted, obstinate, etc - get them out any way you can. I've used cut-off wheels and air tools to cut springs/stems. I've raised valves and knocked their heads off with hammers, heck - I even used a big ole' set of bolt cutters to cut the valves stems - whatever gets the job done. Once you know you're not hung up on saving the old stuff - you can get a lot more brave. :D

Having a large/long forged valve bar is REALLY important - as I can use it to lift the springs up, let the keepers fall out, etc.. I have never used one of the big C-Clamp style of tools - just a real pain getting them into the valley in all the weird angles. I'm sure that if I liked that approach, I'd just modify one to work a bit better - but don't see much of a need.

Anyway, best of luck - take all the ideas you've been given . . . see which ones work for you and get after it. In a few hours of time you'll have it all taken apart.

B&S
 
The best and easiest way to remove valves, is: Have somebody else do it. I've been taking a block apart for over 2 years now, it's been a long and bloody fight and their's only a few valves left.
 
I am also in the middle of a rebuild of an A block (38-41) with a 59AB crank. I was able to get the rear rope seal retainers from Vanpelt. I want to use a crab distributor with the original cam. I know it will need a 3 to 2 bolt adapter. Is this all I need to work with an early cam with the longer nose?
Larry Young
 
Back
Top