
You are using an out of date browser. It may not display this or other websites correctly.
You should upgrade or use an alternative browser.
You should upgrade or use an alternative browser.
3D Printed Ford Battery Case Help
- Thread starter WarbirdPhotog
- Start date


Karl Wescott
Well-known member
Everything is great, with the possible exception of the 39 hours print time.
Print time is about what I would expect. Seems long, but set up the machine, push the button, and walk away (well... check every 6 hours or so).


WarbirdPhotog
Senior Member
It looks great. The only thing I am concerned about is whether the terminals are sticking out far enough. Does a standard battery terminal clamp fit on ok?
That was my concern as well. But, it looks like it'll clamp enough just fine. And, there's raised writing on the battery top itself (POS, NEG, +, -, and some others) that if I were to remove those, would raise it up even more. I thought about making some negative areas on the bottom side of the battery top cover in order to negate that raised writing, but it was going to be a lot of extra work. Much easier to just shave off the writing.
WarbirdPhotog
Senior Member
Everything is great, with the possible exception of the 39 hours print time.
I could have gone much faster with the print. On the Bambu A1, you can do sports mode (24% faster) and ludicrous mode (66% faster) which will dramatically shorten the print times at the cost of slight quality (sports) or major quality (ludicrous). I also had a lot of custom settings in the printer to slow down the printing to get even better details. So, if you are not going for perfect 1 to 1 matching of the original or if you don't mind doing some more sanding work to smooth imperfections out, I'm sure this could easily get knocked down to a day or less. Especially with a filament like Rapid PETG, which is made to go fast.
I only wanted to do minimal sanding to smooth out micro lines, so I went with it slower. But as Karl stated, I only checked on it once every 8 hours or so. If you trust your 3D printer, have the settings dialed in, and you know your filament... you don't have to watch it. Plus, the Bambu printers have built-in cameras so I can see the status of the print live from my computer or phone.

Bored&Stroked
Well-known member
What is going to be interesting is how big will the CAD model become once you apply the texture to it? It takes a whole lot of small triangles to make that pattern and hopefully the resulting STL file (if that is what you're using) isn't too big to use. My guess is that it will be huge, but that really shouldn't be too much of an issue.
Great CAD work . . . a man after my own 3D heart! LOL
Great CAD work . . . a man after my own 3D heart! LOL
WarbirdPhotog
Senior Member
What is going to be interesting is how big will the CAD model become once you apply the texture to it? It takes a whole lot of small triangles to make that pattern and hopefully the resulting STL file (if that is what you're using) isn't too big to use. My guess is that it will be huge, but that really shouldn't be too much of an issue.
Great CAD work . . . a man after my own 3D heart! LOL
It's not been too large so far. The STL binary format seems to help keep the sizes mostly small, but you are correct that once I apply the texture, it might be a slightly different story. Still working on that, what I thought was going to work isn't going to be the answer now sadly.
I've got a reproduction '40-style battery sitting on my workbench that I bought in 1980 but never filled with acid for my '40 tudor 'retirement' project (I bought a basket case when I was 19 in 1980, and am about 4 years from being able to 'officially' start on it). I much rather like the idea of slipping something like this over an AGM battery than activating what I have. Plus I could use it in my '44-vintage Ford 2N tractor. The 9N-2N-8N resto crowd would go nuts for something like this, too.
WarbirdPhotog
Senior Member
So, using the CWMoss sold correct battery and ground cables, they both do connect enough to work. The positive had no problems at all. But the negative doesn't sit on the terminal fully. That being said, even without the cover the cable doesn't sit on the terminal fully as well.
Here's the cables loosely attached

And here's the positive ground that won't fully go on even without the cover. I'd need a hammer to hammer it down.

Next up... I've sanded the entire cover. Need to glue the three pieces together, finish sanding as a completed cover assembly, then I can paint it! The base tray is printing right now... 2 of the 3 pieces are already finished on that. Side walls are still being worked on for the star texture.
Here's the cables loosely attached
And here's the positive ground that won't fully go on even without the cover. I'd need a hammer to hammer it down.
Next up... I've sanded the entire cover. Need to glue the three pieces together, finish sanding as a completed cover assembly, then I can paint it! The base tray is printing right now... 2 of the 3 pieces are already finished on that. Side walls are still being worked on for the star texture.

Karl Wescott
Well-known member
A thought...
If you can get the battery cables to fit well enough to work properly but the post is too low, consider making a dummy 3D extension of the post which should be able to look good and get squished slightly on installation to keep it in place.
If you can get the battery cables to fit well enough to work properly but the post is too low, consider making a dummy 3D extension of the post which should be able to look good and get squished slightly on installation to keep it in place.
Bored&Stroked
Well-known member
A thought...
If you can get the battery cables to fit well enough to work properly but the post is too low, consider making a dummy 3D extension of the post which should be able to look good and get squished slightly on installation to keep it in place.
You sneaky guy you!

WarbirdPhotog
Senior Member
Quick update... The cover is completely printed, sanded, and ready to glue together. That'll be this week. Once that's done, I can paint it and it's ready to go!

The base tray is also completed. Here it is with the 3d printed dowel inserts slightly pushed in. Once I get high strength glue put on the dowels and the joining sides of the base and the sides, I can push them together and clamp them to glue. That'll be in the next day. Then I'll do a final standing of the whole completed tray assembly.

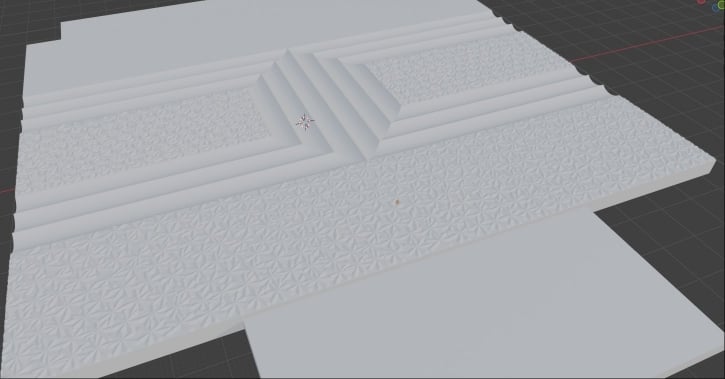
And more progress with the Star texture on the sidewalls, after having to start from scratch due to the last thing not working, I realized I just wasn't going to be able to build that in tinkercad. So I switched to blender, and the results are looking good so far. I need to scale these stars a little more evenly, but it's coming together! I'll definitely need the .2mm nozzle to print the walls so the texture comes out sharp.
The base tray is also completed. Here it is with the 3d printed dowel inserts slightly pushed in. Once I get high strength glue put on the dowels and the joining sides of the base and the sides, I can push them together and clamp them to glue. That'll be in the next day. Then I'll do a final standing of the whole completed tray assembly.
And more progress with the Star texture on the sidewalls, after having to start from scratch due to the last thing not working, I realized I just wasn't going to be able to build that in tinkercad. So I switched to blender, and the results are looking good so far. I need to scale these stars a little more evenly, but it's coming together! I'll definitely need the .2mm nozzle to print the walls so the texture comes out sharp.
Ray in La Mesa
Well-known member
I've seen tapered reamers, you might find one to ream out the negative clamp to fit the positive post.
WarbirdPhotog
Senior Member
I'm going to try the screw driver trick first, if that won't budge, I'll look into a reamer or a Dremel!I've seen tapered reamers, you might find one to ream out the negative clamp to fit the positive post.

deuce_roadster
Well-known member
I have a 4 way battery cable terminal cleaner (cleans inside of cable and outside of posts) that has on one end a tapered reamer that may remove enough material to let the cable go down farther on your post. It looks like there is room for it to go down. You could also mill off a little bit of the top of the clamp as that would remove the smallest diameter part of the tapered hole. Every little bit helps.
WarbirdPhotog
Senior Member
Finally, an update! I've been crazy busy the last 2 weeks, so I've only been able to work on it here and there. But, some big progress! The cover is completely finished, the base tray is almost done, just needing painting, and I've begun to start test printing the sidewalls and the frustrating star texture.
Let's start with the cover... I printed out the three pieces and then glued them together with a plastic two-part epoxy glue. This worked really well and fused them together. I then was able to sand the entire thing one final time. (I posted this photo in the last update, so just a refresher)
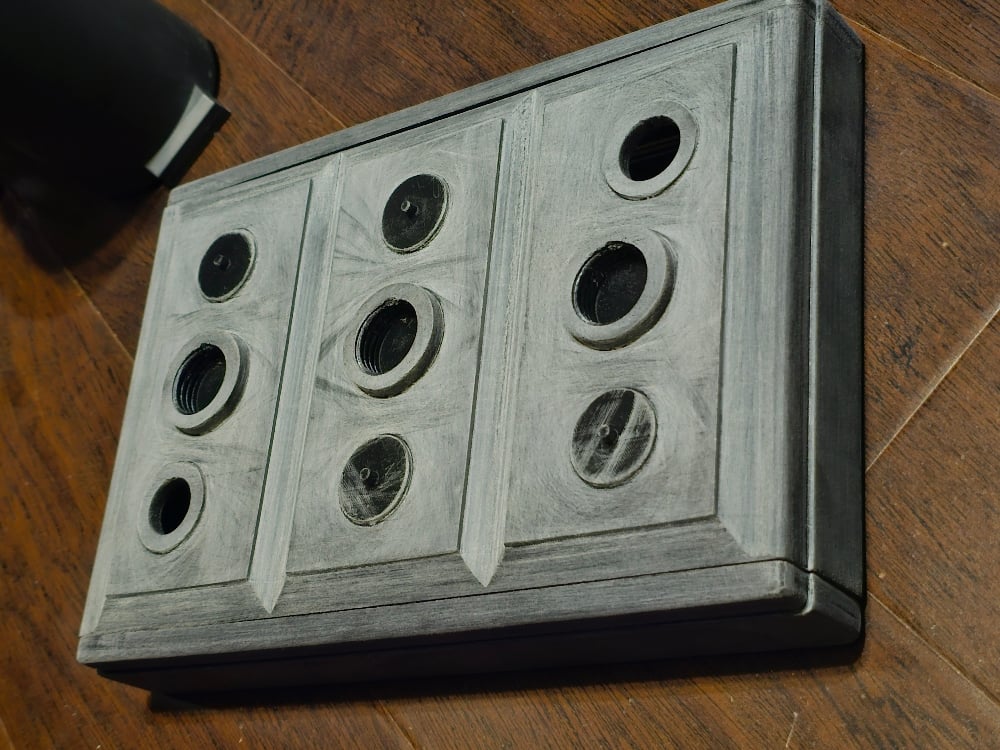
And here's the final result with the caps and plugs installed! I used a matte black paint for the overall finish. Painting several coats mint I get a very slight sheen to it, which matches the original battery.

I wanted to go to the extra mile, so I masked off the top cells and the sides and I sprayed a rubberized undercoat onto the areas where the tar would be, giving it a texture. I then also hit it with the flat black. This makes them look more like a tar finish.

For the bottom tray, my original idea didn't pan out using large 3d printed dowels. Because of this, I ended up just printing the two sides without the dowels and gluing them all together carefully. I then sanded the entire assembly. I won't be painting this until I get the sidewalls completed and installed. Then everything will get a few layers of flat black. The slots in the base are for the sidewalls slide into.

For the Star texture, I struggled with four different 3D programs trying to get that start texture to work. Due to the nature of the texture with the randomness in the shape, size, and position of the star texture... It made things difficult. What I ended up doing is creating the start texture and Photoshop is a height map. That meant that I could digitally lay out all the stars in a specific way and have them repeat after a certain length. That saved me time. But then it came to getting them translated from black and white height map (like a topography map) into one of the 3D programs. It turns out fusion360 was the way to go.
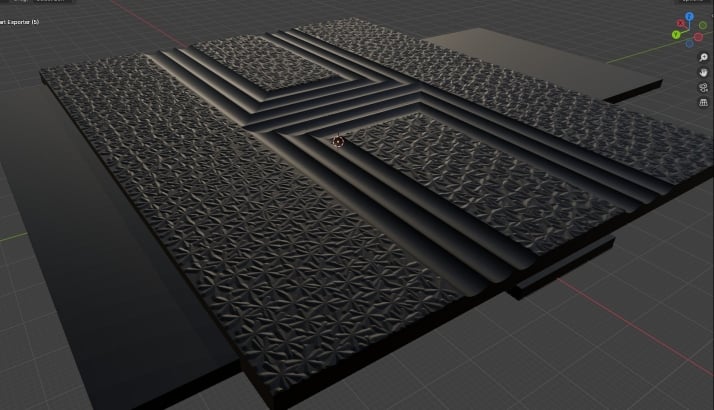
But before I printed it out, I wanted to see how the stars would look. So I did two test prints, one on the .4mm nozzle and one on the .2mm nozzle. The .2mm won with no contest! The photo below shows the two samples, the right is the .4mm nozzle (you can't really make out the stars at all, it's just a jumbled mess), The the middle is the .2mm nozzle, looking really perfect. Both of these sample pieces were painted with the same flat black as the cover. Finally, for comparison, the left is a JB weld mold impression I did on the original battery when I had it so I could keep a good three-dimensional reference of the star texture. The middle one looks pretty spot on to that!

I was able to then pull in the full first side piece and start printing, but encountered a issue with the wall being too thin. So now I'm redesigning it to be thicker to prevent any warping during printing.

Hopefully will have some more updates by the end of the week or next week!
Let's start with the cover... I printed out the three pieces and then glued them together with a plastic two-part epoxy glue. This worked really well and fused them together. I then was able to sand the entire thing one final time. (I posted this photo in the last update, so just a refresher)
And here's the final result with the caps and plugs installed! I used a matte black paint for the overall finish. Painting several coats mint I get a very slight sheen to it, which matches the original battery.
I wanted to go to the extra mile, so I masked off the top cells and the sides and I sprayed a rubberized undercoat onto the areas where the tar would be, giving it a texture. I then also hit it with the flat black. This makes them look more like a tar finish.
For the bottom tray, my original idea didn't pan out using large 3d printed dowels. Because of this, I ended up just printing the two sides without the dowels and gluing them all together carefully. I then sanded the entire assembly. I won't be painting this until I get the sidewalls completed and installed. Then everything will get a few layers of flat black. The slots in the base are for the sidewalls slide into.
For the Star texture, I struggled with four different 3D programs trying to get that start texture to work. Due to the nature of the texture with the randomness in the shape, size, and position of the star texture... It made things difficult. What I ended up doing is creating the start texture and Photoshop is a height map. That meant that I could digitally lay out all the stars in a specific way and have them repeat after a certain length. That saved me time. But then it came to getting them translated from black and white height map (like a topography map) into one of the 3D programs. It turns out fusion360 was the way to go.
But before I printed it out, I wanted to see how the stars would look. So I did two test prints, one on the .4mm nozzle and one on the .2mm nozzle. The .2mm won with no contest! The photo below shows the two samples, the right is the .4mm nozzle (you can't really make out the stars at all, it's just a jumbled mess), The the middle is the .2mm nozzle, looking really perfect. Both of these sample pieces were painted with the same flat black as the cover. Finally, for comparison, the left is a JB weld mold impression I did on the original battery when I had it so I could keep a good three-dimensional reference of the star texture. The middle one looks pretty spot on to that!
I was able to then pull in the full first side piece and start printing, but encountered a issue with the wall being too thin. So now I'm redesigning it to be thicker to prevent any warping during printing.
Hopefully will have some more updates by the end of the week or next week!

corvette8n
Well-known member
All I can say is Wow, thanks for all your hard work.
WarbirdPhotog
Senior Member
Quick update again... We're going vertical! The top cover and bottom tray are done so I've begun working on the side walls. After several redos (trial and error) of the design, the smaller sides are complete! They still need a little sanding on the deco grooves, and then the flat black painting which will smooth out the star texture. But I'm waiting to paint the sidewalls or the bottom tray until it's complete as a unit so it can be painted together.
The sidewalls have a flat panel that is glued onto the bottom of them that allow them to slide into the bottom tray. That gives perfect alignment.
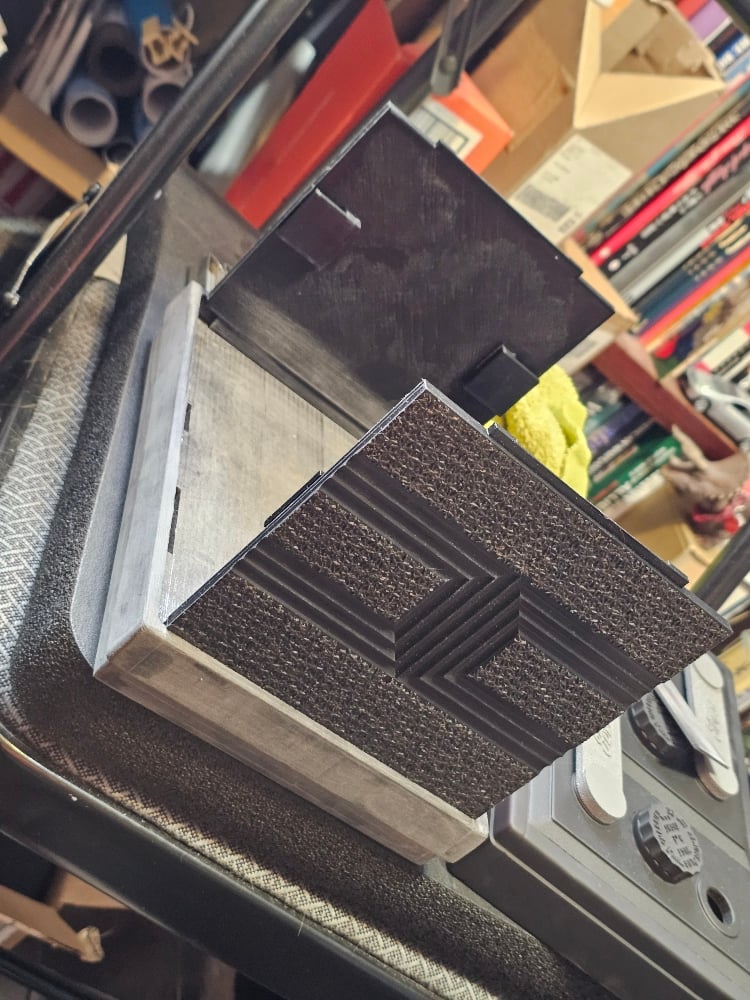
Working now on the final two pieces, the long side walls. These are a bit more complicated because they have a curved edge that the Star texture needs to follow. I've been having much difficultly with a crazy amount of different 3D programs trying to get that start texture to curve. Hoping to find a solution soon so I can get those side walls printed. Really want to get this battery finished!
The sidewalls have a flat panel that is glued onto the bottom of them that allow them to slide into the bottom tray. That gives perfect alignment.
Working now on the final two pieces, the long side walls. These are a bit more complicated because they have a curved edge that the Star texture needs to follow. I've been having much difficultly with a crazy amount of different 3D programs trying to get that start texture to curve. Hoping to find a solution soon so I can get those side walls printed. Really want to get this battery finished!

Seth Swoboda
Well-known member
Any progress lately?