1929 Ford Coupe - Rusty to Solid

thanks Country!1

finished up the drivers side bracket this morning thats they dont repop

cd82ce41.jpg


then set the seat pan in transferred the rivet holes and got everything lined up there. the rivets arnt set just keeping the panel aligned . i didnt put the rear pan in because it will be much easier to work on the rear of the car with out that piece in.


e03df768.jpg


moving back ward to where the new subframe was once welded on . it needed some help in my opinion

b9aa294b.jpg


a few patches later and a little tig welding its looking a little better

c740060f.jpg


and the connection on the drivers side after

d1d09b06.jpg


got all the welds smoothed out
 
Last edited:
This is an amazing thread to follow! You should think about putting this all together and getting it published! Thanks for taking the time to do this.
 
thanks seth !!


just another days work 28annie! but i do like taking the time to show folks what goes into bringing a car back the correct way .


this was a random hole cut here where there was a body mount

997dd898.jpg


had to patch it before i put the subframe in

874b1b4c.jpg


the subframe was cut to close to the brace so i couldnt clean up the weld nicely. so i cut out some of the new subframe so i could achieve that

5afc889f.jpg


and the new connection

6de9a819.jpg
 
Last edited:
Great work Flop and the owner has got to be loving this, almost as good as watching over your shoulder! Keep the updates coming! Dale
 
Hey flop Im going through the same thing on my 29 truck, first time on restoring one. Any hints on doing the sub rails and could u fab. up a set of door post connectors for me? Restoring my grandfathers truck witch he handed down to me was I was about five now Im 45 and just getting started, would mean alot to me with alittle help in the right direction Thanks Pete
 
thanks everyone!!


Vanspeed i never really use a dremel . i grind with a 36 grit 6 inch disc on an electric sander . i also use 60 grit on a 3 inch roloc and a file.


29 -make sure you are working off a frame that is level and square .ill send you a message about the connectors
 
did some more work on Miles coupe today

put a patch in this riser .no sense on getting a repop when only 1 tiny section was rotted out

7d32dbde.jpg


got it all smoothed out

4f06260d.jpg


this piece in my opinion this rear panel below the decklid is the biggest pain to get out of an A


ad8bdff8.jpg


after i got it out had to redrill and tap all 8 screw holes in the rear subrail

3c170cc5.jpg
 
Last edited:
Excellent work, Flop! I am getting closer to taking my 29 apart to check just how solid it really is, so this thread is extremely helpful to me in case mine isn't as solid as it was reported.

Subscribed, and ready for your next posts!! :)
 
thanks co29 1 glad to know people can check on the thread and get some help from it!!

didnt get much done today juggling a bunch of projects at the moment

but i did get this area cleaned up and for the most part have 90 percent of all the subframe work done

aafd8c60.jpg


and riveted back in after i patched it

aaad7644.jpg
 
Last edited:
well up front to a rotten door pillar

a680dfee.jpg


a little brace so i can fix the bracing

718e1114.jpg


bent this up made the step with a bead roller and all welded up ready to get covered in sheet metal!!

294fd3ef.jpg
 
Last edited:
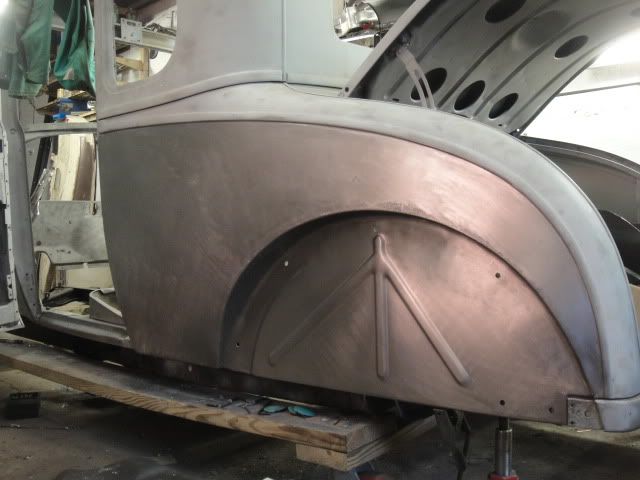
well got the quarter patched and the wheel well a quarter of the way in

i also wonder why they make the patches so horrible ? i mean come on almost a quarter inch short isnt from die wear!!

dfbab42c.jpg


22218619-1.jpg
 
Last edited:
no idea if all patches are short but every patch needs messed with in some wya or the other

thanks dana !

got the quarter squared away today


and heres a few holes of what was left after the patch was in

63c21897.jpg


IMG_0827.jpg


IMG_0828.jpg


and this is it all finished up

DSC05599.jpg


DSC05602.jpg


DSC05601.jpg


DSC05600.jpg
 
Last edited:
well took a run to snyders today picked up the rear patch for Mile's coupe as well as a truck full of other things

heres the problem .

8bb18205.jpg


which in-turn sucked in the trunk gap

a620a6f1.jpg


a little brass and a double panel!!

501e3853.jpg


tacked in

7317b950.jpg


about 75% done

0663b255.jpg


1a8cbfbc.jpg


no real complaints with the panel either a little tweaking here and there but no major surgery to it yet !
 
Last edited:
Back
Top