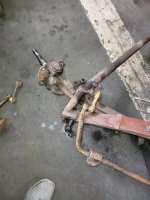
Going for a dip 1942 Ford Coupe

Do you know what chemical(s) are used in this stripping process? I assume there is one process for removing paint and another for rust conversion.

I never asked him about what chemicals he uses. He has two tanks, one for stripping paint, undercoat and body filler. The tank is heated. Parts stay in for 4 to 7 days and he pressure washes them upon removal. Second tank is for derusting and stays in depending on amount of rust. He washes parts and then applies a rust preventitive which last for a few months.
 
We have a shop manufactured spreader, a porter power and threaded rod. I usually use the threaded rod because it is the least dangerous. If you are just going to replace the spring without removing the rear axle then I suggest the threaded rod. Remove the clamps holding the spring and also shock arms. Drop the axle as far as it will go. Use two c-clamps to hold spring leaves together. Remove center bolt. Insert a length of 5/16thx18 thread, double nutted on one end (tight) and run a nut up the other end to hold spring leaves tight while you remove c-clamps. Holding the double nut with vice grips slowly loosen the other nut and allow spring leaves to separate. After removing threaded rod remove the spring hangers and you should be able to remove main leaf as it does not have much tension on it.
If I am rebuilding a spring, I sandblast the leaves, paint both sides and apply Slip Plate between leaves and reverse the proceedure. There are other ways to remove spring. If you do a search on this site you should find them.
 
Here are some pictures of using the clamps and threaded rod to remove the leaf springs.
 

Attachments

  • 20231229_143514.jpg
    20231229_143514.jpg
    42.8 KB · Views: 74
  • 20231229_143558.jpg
    20231229_143558.jpg
    42.5 KB · Views: 71
  • 20231229_143608.jpg
    20231229_143608.jpg
    44.4 KB · Views: 76
Making some progress on the chassis, front end and brakes.
 

Attachments

  • 20220219_114920.jpg
    20220219_114920.jpg
    62.8 KB · Views: 28
  • 20220219_115010.jpg
    20220219_115010.jpg
    38.3 KB · Views: 26
  • 20220219_115015.jpg
    20220219_115015.jpg
    44.6 KB · Views: 28
  • 20220219_115020.jpg
    20220219_115020.jpg
    46.4 KB · Views: 25
  • 20220219_133035.jpg
    20220219_133035.jpg
    38.4 KB · Views: 25
  • 20220219_133045.jpg
    20220219_133045.jpg
    40.9 KB · Views: 27
  • 20220219_133049.jpg
    20220219_133049.jpg
    49.2 KB · Views: 26
  • 20220226_100656.jpg
    20220226_100656.jpg
    59.5 KB · Views: 28
  • 20220226_100704.jpg
    20220226_100704.jpg
    57.6 KB · Views: 28
  • 20220226_105105.jpg
    20220226_105105.jpg
    36.2 KB · Views: 27
  • 20221008_101342.jpg
    20221008_101342.jpg
    39.8 KB · Views: 28
  • 20221008_101348.jpg
    20221008_101348.jpg
    40 KB · Views: 30
  • 20221008_101351.jpg
    20221008_101351.jpg
    52.2 KB · Views: 26
  • 20221008_101355.jpg
    20221008_101355.jpg
    56.4 KB · Views: 28
Shipped off the shocks to have rebuilt by Andy's Shocks in MA.
 

Attachments

  • 20221217_093230.jpg
    20221217_093230.jpg
    47.7 KB · Views: 26
  • 20221217_093325.jpg
    20221217_093325.jpg
    50 KB · Views: 25
  • 20230114_092141.jpg
    20230114_092141.jpg
    41.4 KB · Views: 26
  • 20230114_092204.jpg
    20230114_092204.jpg
    77.7 KB · Views: 26
  • 20230114_092219.jpg
    20230114_092219.jpg
    71 KB · Views: 24
  • 20230114_092223.jpg
    20230114_092223.jpg
    60.9 KB · Views: 24
  • 20230114_092227.jpg
    20230114_092227.jpg
    51.9 KB · Views: 24
  • 20230114_092239.jpg
    20230114_092239.jpg
    85.1 KB · Views: 26
  • 20230114_092246.jpg
    20230114_092246.jpg
    76.5 KB · Views: 26
  • 20230114_153259.jpg
    20230114_153259.jpg
    85.3 KB · Views: 26
  • 20230114_153305.jpg
    20230114_153305.jpg
    73.7 KB · Views: 25
  • 20230114_153314.jpg
    20230114_153314.jpg
    76.8 KB · Views: 27
  • 20230204_151018.jpg
    20230204_151018.jpg
    54.6 KB · Views: 29
  • 20230204_151022.jpg
    20230204_151022.jpg
    47.3 KB · Views: 25
  • 20230204_151025.jpg
    20230204_151025.jpg
    44.7 KB · Views: 24
Additional pictures.
 

Attachments

  • 20230204_151031.jpg
    20230204_151031.jpg
    48.6 KB · Views: 38
  • 20230304_142853.jpg
    20230304_142853.jpg
    98.8 KB · Views: 38
  • 20230304_142858.jpg
    20230304_142858.jpg
    43.2 KB · Views: 41
  • 20230410_073101.jpg
    20230410_073101.jpg
    37.8 KB · Views: 47
  • 20230420_163842.jpg
    20230420_163842.jpg
    49 KB · Views: 43
I meant to let you know yes this one has a rear seat. Like you I have many other projects, this one I just work on Saturdays. Slow going but enjoying every minute of it.

Thanks!
 

Attachments

  • 2021 Back seat.jpg
    2021 Back seat.jpg
    63.8 KB · Views: 343
Pay special attention to where sheet metal is folded around for attachment like where a door skin attaches to the inner frame. I had a 34 sedan delivery Redi-stripped many years ago and after final paint, in places like described, the paint came off months later. There is no way to get the chemicals out of those spaces. Wonderful process for removing rust though.
The body looks REALLY straight if both sides look the same, nice.

My buddy had a car dipped and he took a propane torch and heated the seams until it all bubbled out, and it did bubble out!
 
Painted and installed new gas tank.
 

Attachments

  • 20230422_132040.jpg
    20230422_132040.jpg
    35.7 KB · Views: 312
  • 20230527_093453.jpg
    20230527_093453.jpg
    39.8 KB · Views: 310
  • 20230527_093814.jpg
    20230527_093814.jpg
    50.3 KB · Views: 310
Update: Completed rebuilding transmission using Vanpelt parts and specs.
 

Attachments

  • 20220430_114332.jpg
    20220430_114332.jpg
    56.9 KB · Views: 38
  • 20220430_114336.jpg
    20220430_114336.jpg
    47.3 KB · Views: 36
  • 20220701_084739.jpg
    20220701_084739.jpg
    44.6 KB · Views: 36
  • 20220701_084729.jpg
    20220701_084729.jpg
    77.1 KB · Views: 36
  • 20220730_100025.jpg
    20220730_100025.jpg
    35.6 KB · Views: 35
  • 20220730_100033.jpg
    20220730_100033.jpg
    43.9 KB · Views: 34
  • 20220730_100040 - Copy.jpg
    20220730_100040 - Copy.jpg
    47 KB · Views: 33
  • 20220730_134438.jpg
    20220730_134438.jpg
    46.2 KB · Views: 37
  • 20220730_134443.jpg
    20220730_134443.jpg
    50.6 KB · Views: 34
  • 20231111_100555.jpg
    20231111_100555.jpg
    50.9 KB · Views: 33
  • 20231124_093541.jpg
    20231124_093541.jpg
    52.1 KB · Views: 34
  • 20231111_110358.jpg
    20231111_110358.jpg
    42.3 KB · Views: 33
  • 20231111_100547.jpg
    20231111_100547.jpg
    48.2 KB · Views: 33
Seth, my experience is the hole for the sender is not large enough for the sender on the Drake tank for an OEM sender.
 
Back
Top