Distributor Bushing Tools

Tom Wesenberg

Well-known member
3b2f2b2a.jpg


9aefbf7a.jpg


ebe5203e.jpg


e0bc03b6.jpg


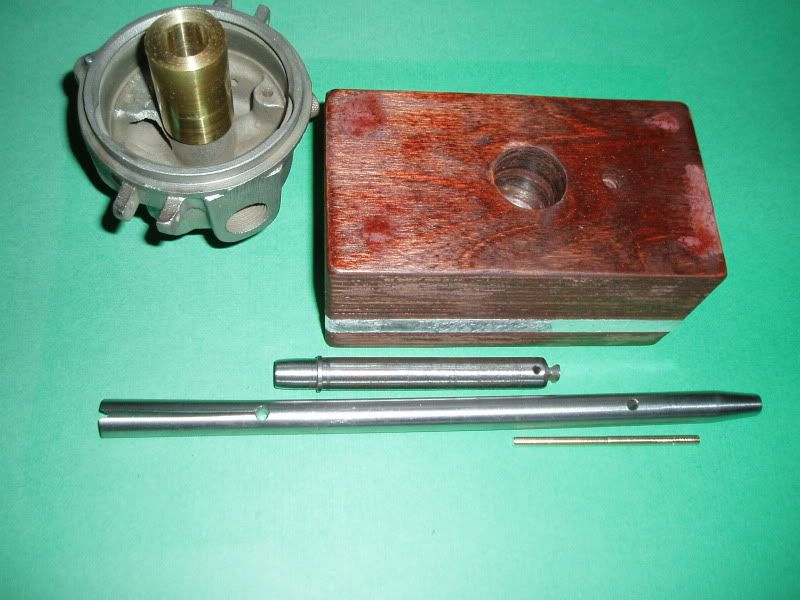
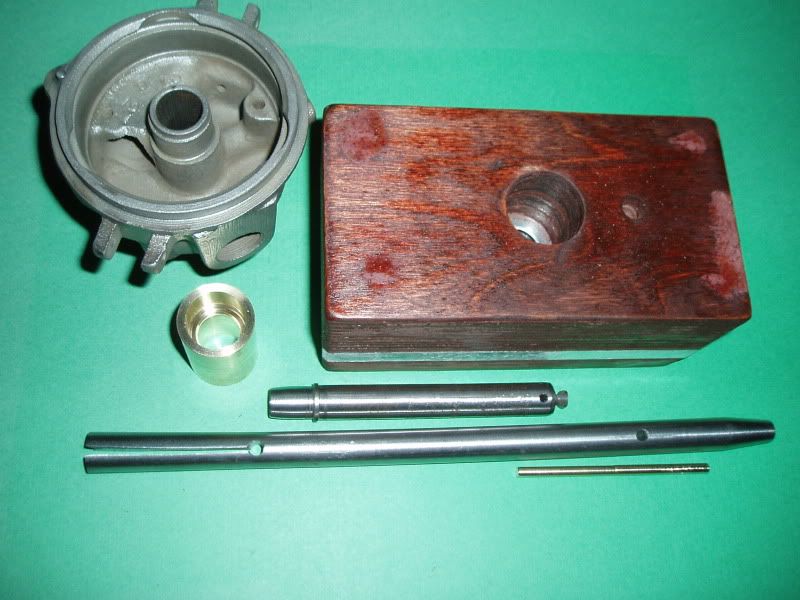
I made these tools yesterday to help make removing and installing distributor bushings easier. I used to just take an old dist. shaft and turn the collar down enough to fit through the 9/16" bore of the housing and drive out both bushings at once. The problem with this method is you are often trying to push the top bushing down through old dried grease, oil, dirt and rust, and this can get hard to do.

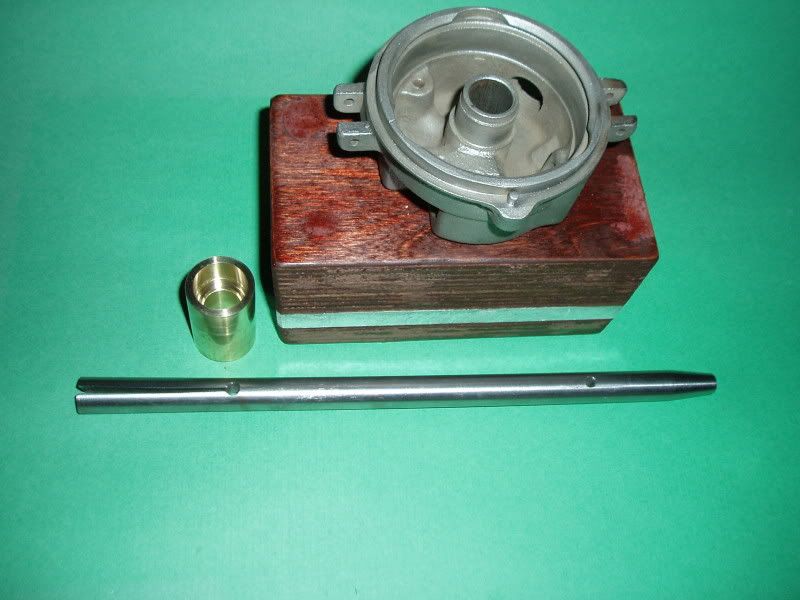
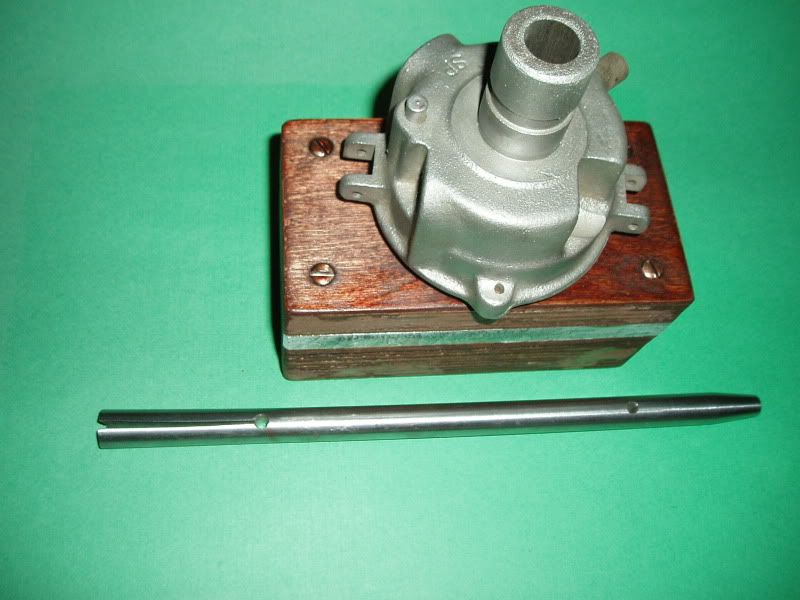
I used a 1/2" shaft 10" long and slit one end 2 3/8" deep and drilled a 1/8" hole at the end of the slit. I turned the slit end slightly concave, so it will have a sharp edge to grab the top end of the bottom bushing. Then I spread the slit so the outside diameter of the end is 9/16". I also drilled a hole on the other end, for the brass pin to go through to use as a pull handle. I tapered the pull end of the tool so it won't swell larger than 1/2" when hammering on it. I pull the tool up from the bottom of the housing, until it gets past the bottom bushing and spreads to 9/16". I then set the distributor into the block and hammer out the bottom bushing.

I then slip the brass collar over the top of the housing and set it into the shallow side of the block and drive out the top bushing. The collar is 1" brass with a 9/16" hole drilled clear through. I then counterbored two steps so it would slip over the top of the center of the housing and support on the lip for the spring, plus on the lip for the top plate.

The block is made from 3 pieces of 3/4" plywood and a piece of 1/2" aluminum, plus a 1/8" thick steel flat washer. I clamped the 4 pieces together, then drilled five 1/8" holes, one for the center hole and 4 for the screws. I then cut a 1" hole in the center of the wood blocks, and a 9/16" hole in the aluminum block. The steel washer already had a hole exactly 9/16". I cut a recess a bit under 1/8" deep in one wood block to make a pocket for the steel washer. The steel washer may be overkill, but it will not deform like using the aluminum plate only for a support. The other reason I used a 1/8" thick washer is to get the upper part of the distributor body above the wood block. You want to support the body by the bottom of the part that slips into the head ONLY.

After the bottom bushing is out I then use my old shaft with the turned collar to drive out the top bushing. This will save some wear on the split tool, as it is made from ordinary steel, not tool steel. If I wear this out I may have to braze hard points on the split end, or make a new tool from harder steel.


If I was to make the split shaft again, I would cut the slit 4" long, so it would have more spring.

The 9/16" hole in the brass collar can also be used as an outer support when driving in new bushings, so they don't mush outward or open the split in the bushing.
 
Last edited:
Tom,
You are an amazing machinest and creative thinker! For the few distributors I have worked on, I use a hacksaw blade to cut nearly through the bushing and then peel it out on both ends of the distributor. Your tool would make it much easier. Maybe you can sell one of you tool sets to Dale.
 
You have done a wonderful job but I am like electricity,I take the easiest path. When I remove any bushing,I take a tap and thread it in the bushing and get a size that will cut enough threads to hold and not damage the bore. I then screw a bolt in the threaded bushing and use a slide hammer to pull the bushing. If you do not have a adapter just weld the adapter on to the bolt you are using to screw into the bushing thet you just threaded in It works very well and it is real easy.
 
You have done a wonderful job but I am like electricity,I take the easiest path. When I remove any bushing,I take a tap and thread it in the bushing and get a size that will cut enough threads to hold and not damage the bore. I then screw a bolt in the threaded bushing and use a slide hammer to pull the bushing. If you do not have a adapter just weld the adapter on to the bolt you are using to screw into the bushing thet you just threaded in It works very well and it is real easy.
I do the same thing but, just leave the 9/16 tap in place and drive it out from the other end with a plain shaft. I guess I just skip a step.
 
I screw a tap into the bushing and then slowly press the tap out along with the two bushings into a large socket. I use an old shaft with the collar to press in the new bushings. I use my vise to do the pressing. Then I ream them to size. I wouldn't strike or shock the castings in any way as they can break.
 
I agree with RonC. ....Hammering or shocking the distributor casting anywhere is an invitation for destroying it. It is safest to cut the old bushings partially through their thickness with a mini hacksaw blade and then pick out the remains.
 
Tom,is it possible for you to make these tools to sell? I will be glad to purchase one for my self. Thanks Dennis/CT

With the time involved it could get expensive and that's why I show pictures and give dimensions, so anyone can make their own.

The split rod wouldn't be too bad to make, but I want to try mine first to see how durable it is. The wood and aluminum block takes some time, and the brass collar was a short piece of scrap brass I had. The scrap yard where I used to get aluminum and brass no longer lets anyone in to buy.
 
use a 1/8" pipe tape and screw it in bushing just a little ways. take small bar and tap on the tape and nock the bushing out.
 
Is it safe to assume that you rebuild distributors for people? That may be the cure to the problems in another post.
 
Is it safe to assume that you rebuild distributors for people? That may be the cure to the problems in another post.

I will if someone asks for it.

I'd like to see some pictures from the other thread. That problem should have been solved a long time ago. With over 2,000 views and 75 replies, I'm sure the solution has been given several times. Someone should be curious enough to drive over and see what the solution is.:D
 
Back
Top